

Post content
Post content
NewRich gives creators two ways to publish content, depending on what they want to share.
You can create either:
- Free Posts – A quick and simple way to share updates, photos, thoughts, and other free content with your audience. Free Posts are always free and can only be published to free Subfeeds.
- Products (Advanced Content) – Advanced content types including photos, videos, audio, articles, links, livestreams, and marketplace products. Products can be published for free, offered as a one-time purchase, or included in a subscription.
Creating a Free Post
Free Posts are the fastest way to share updates and engage with your audience.
Unlike Products, Free Posts don't support monetization and can only be published to free Subfeeds.
Where to Start
To create a Free Post, go to your profile and click New Post. Then select Post from the content menu to open the Free Post editor.
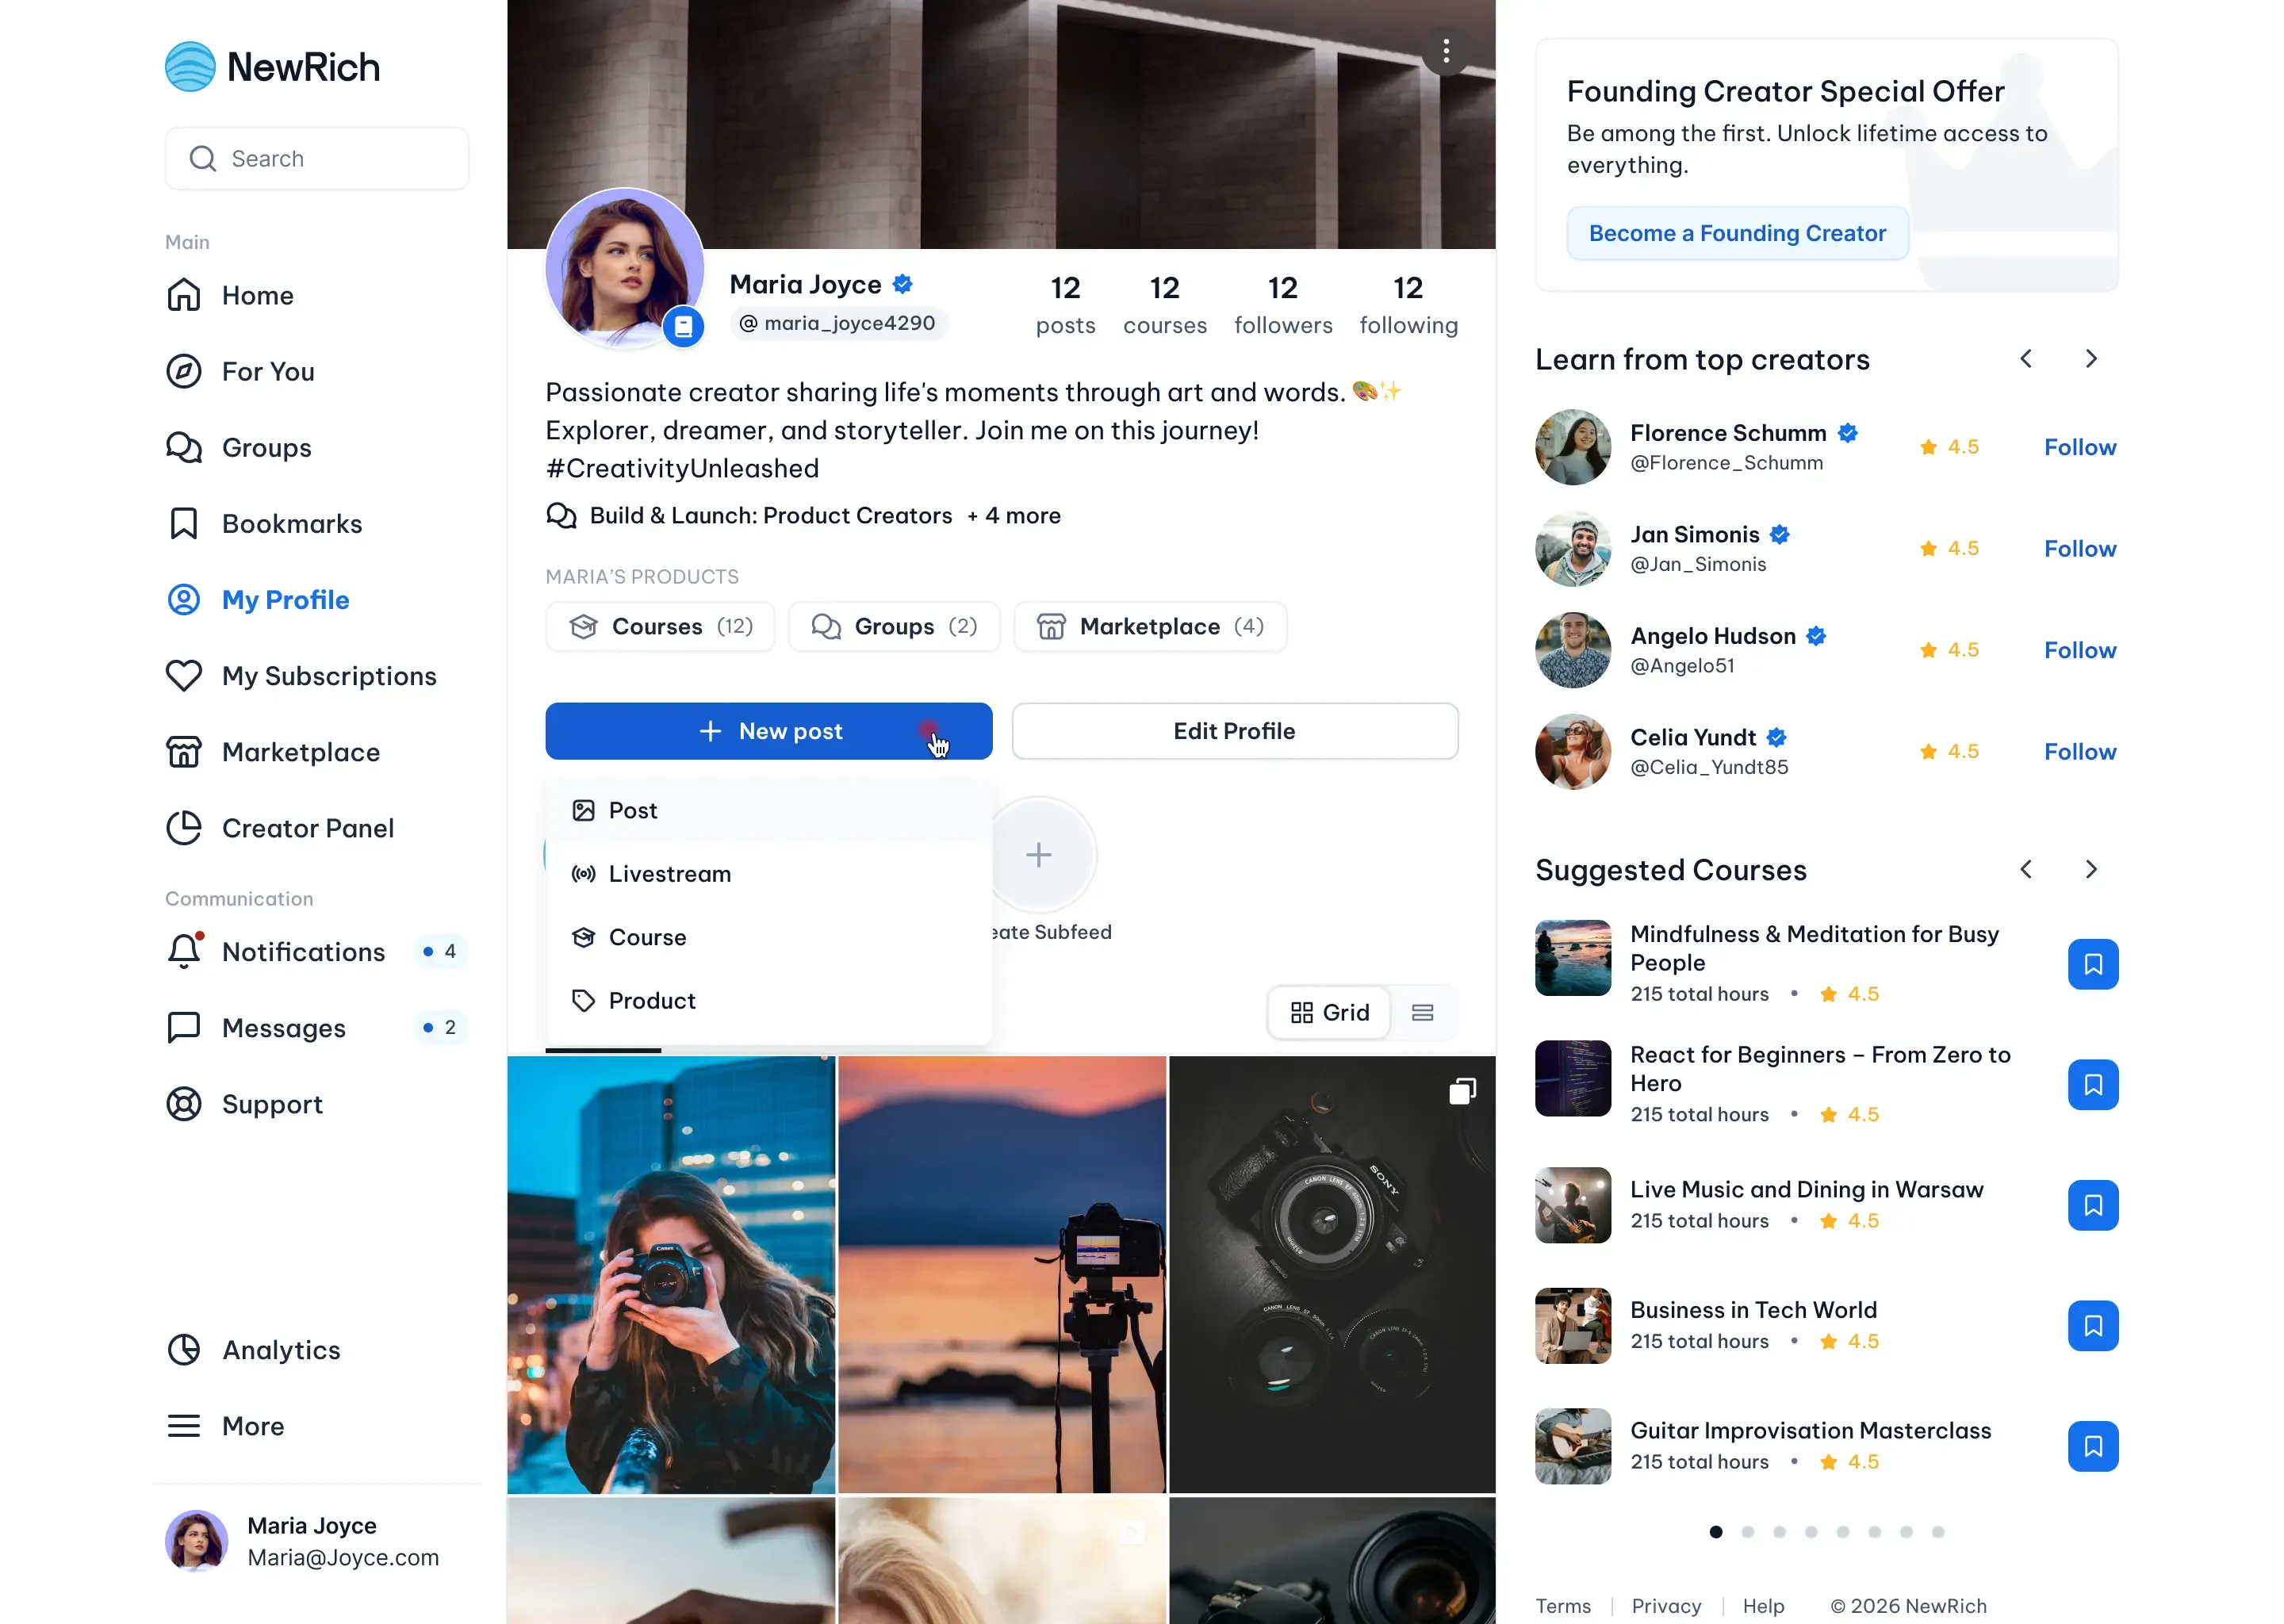
What You Can Add to a Free Post
The Free Post editor allows you to:
- Write your post.
- Upload photos or videos.
- Add tags.
- Choose a free Subfeed.
- Configure basic publishing options, such as hiding like counts or disabling comments.
Free Posts can only be published to free Subfeeds, such as your General Feed or any other free feed you've created.
Step-by-step
- Go to your profile.
- Click New Post.
- Select Post.
- Write your post.
- (Optional) Upload photos or videos.
- Add tags to help organize your content.
- Select a free Subfeed.
- (Optional) Configure publishing options, such as hiding like counts or disabling comments.
- Click Share to publish your post.
Creating Products (Advanced Content)
Products allow you to publish advanced content with flexible publishing and monetization options.
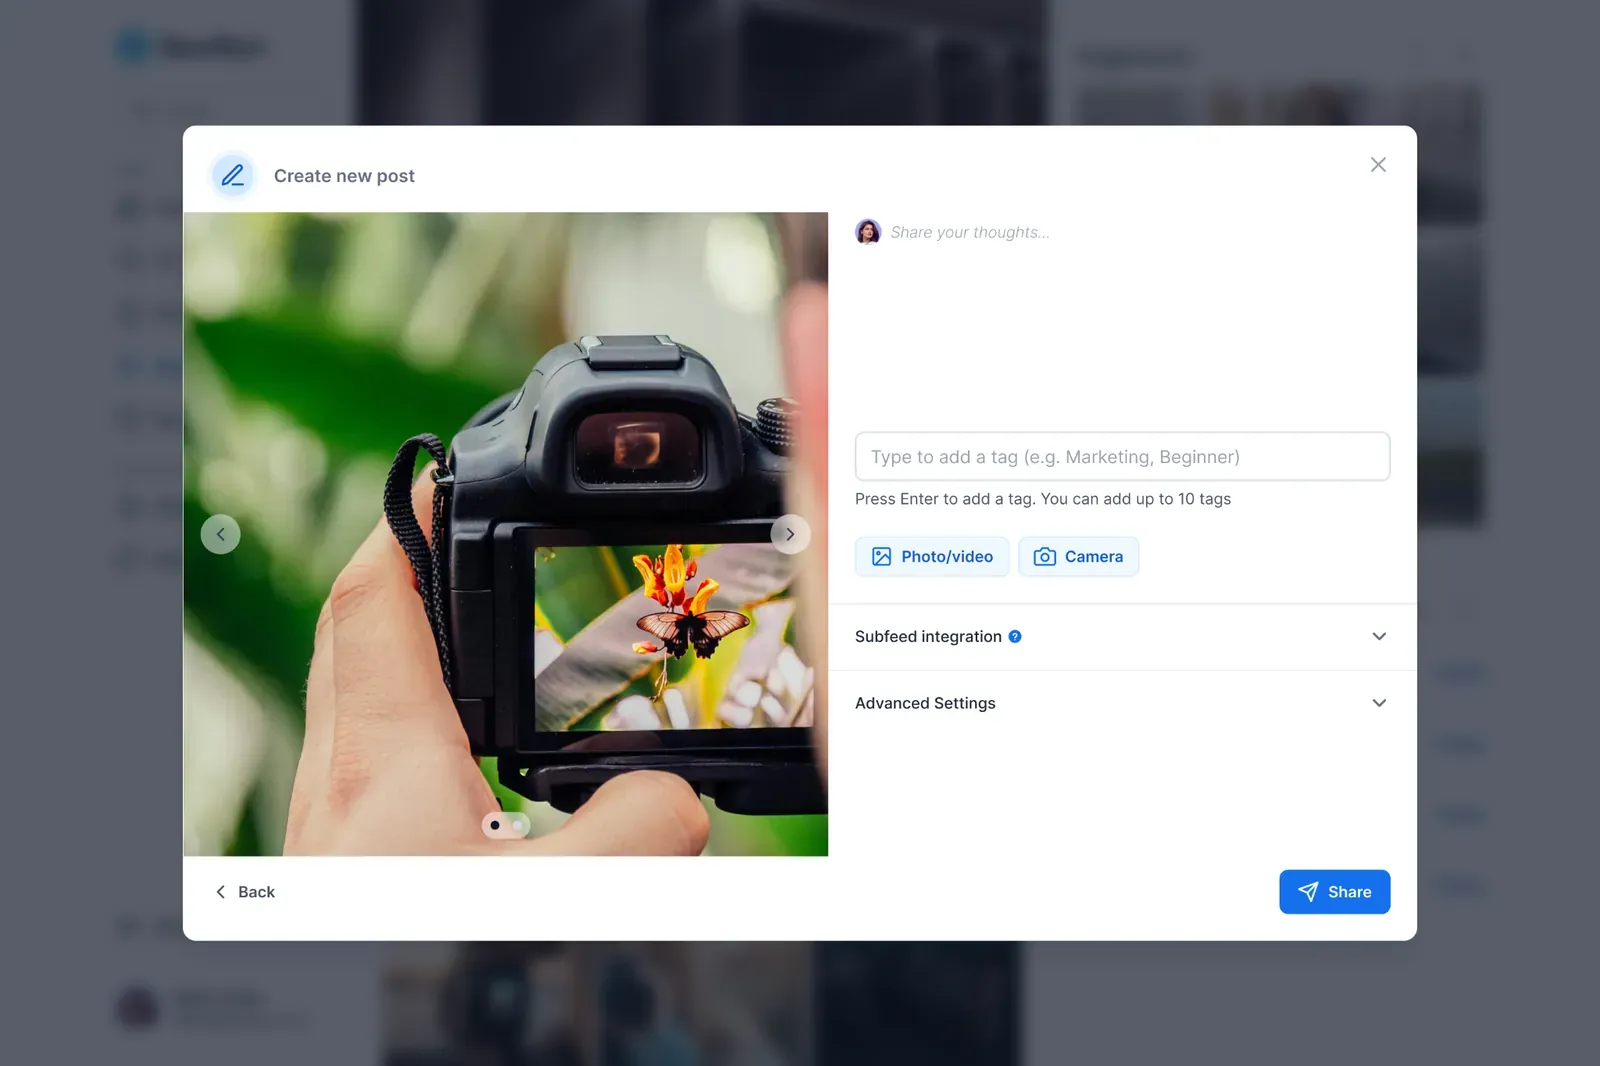
Products are organized into two categories based on what you'd like to create:
Create Content:
- Photo
- Video
- Audio
- Link
- Article
- Livestream
Create Marketplace Product:
- PDF / ePubs
- Apps
- Courses
- Downloadable Files
Depending on the selected Subfeed and access settings, a Product can be:
- Free
- Available as a one-time purchase
- Included in a subscription
- Recurring billing
Where to Start
To create a Product:
- Go to your profile.
- Click New Post.
- Select Product.
- Choose the Product type you'd like to create.
After selecting a Product type, you'll be guided through the Product Creation flow.
The Product Creation flow consists of three steps:
- Basic Information
- Pricing
- Advanced Settings
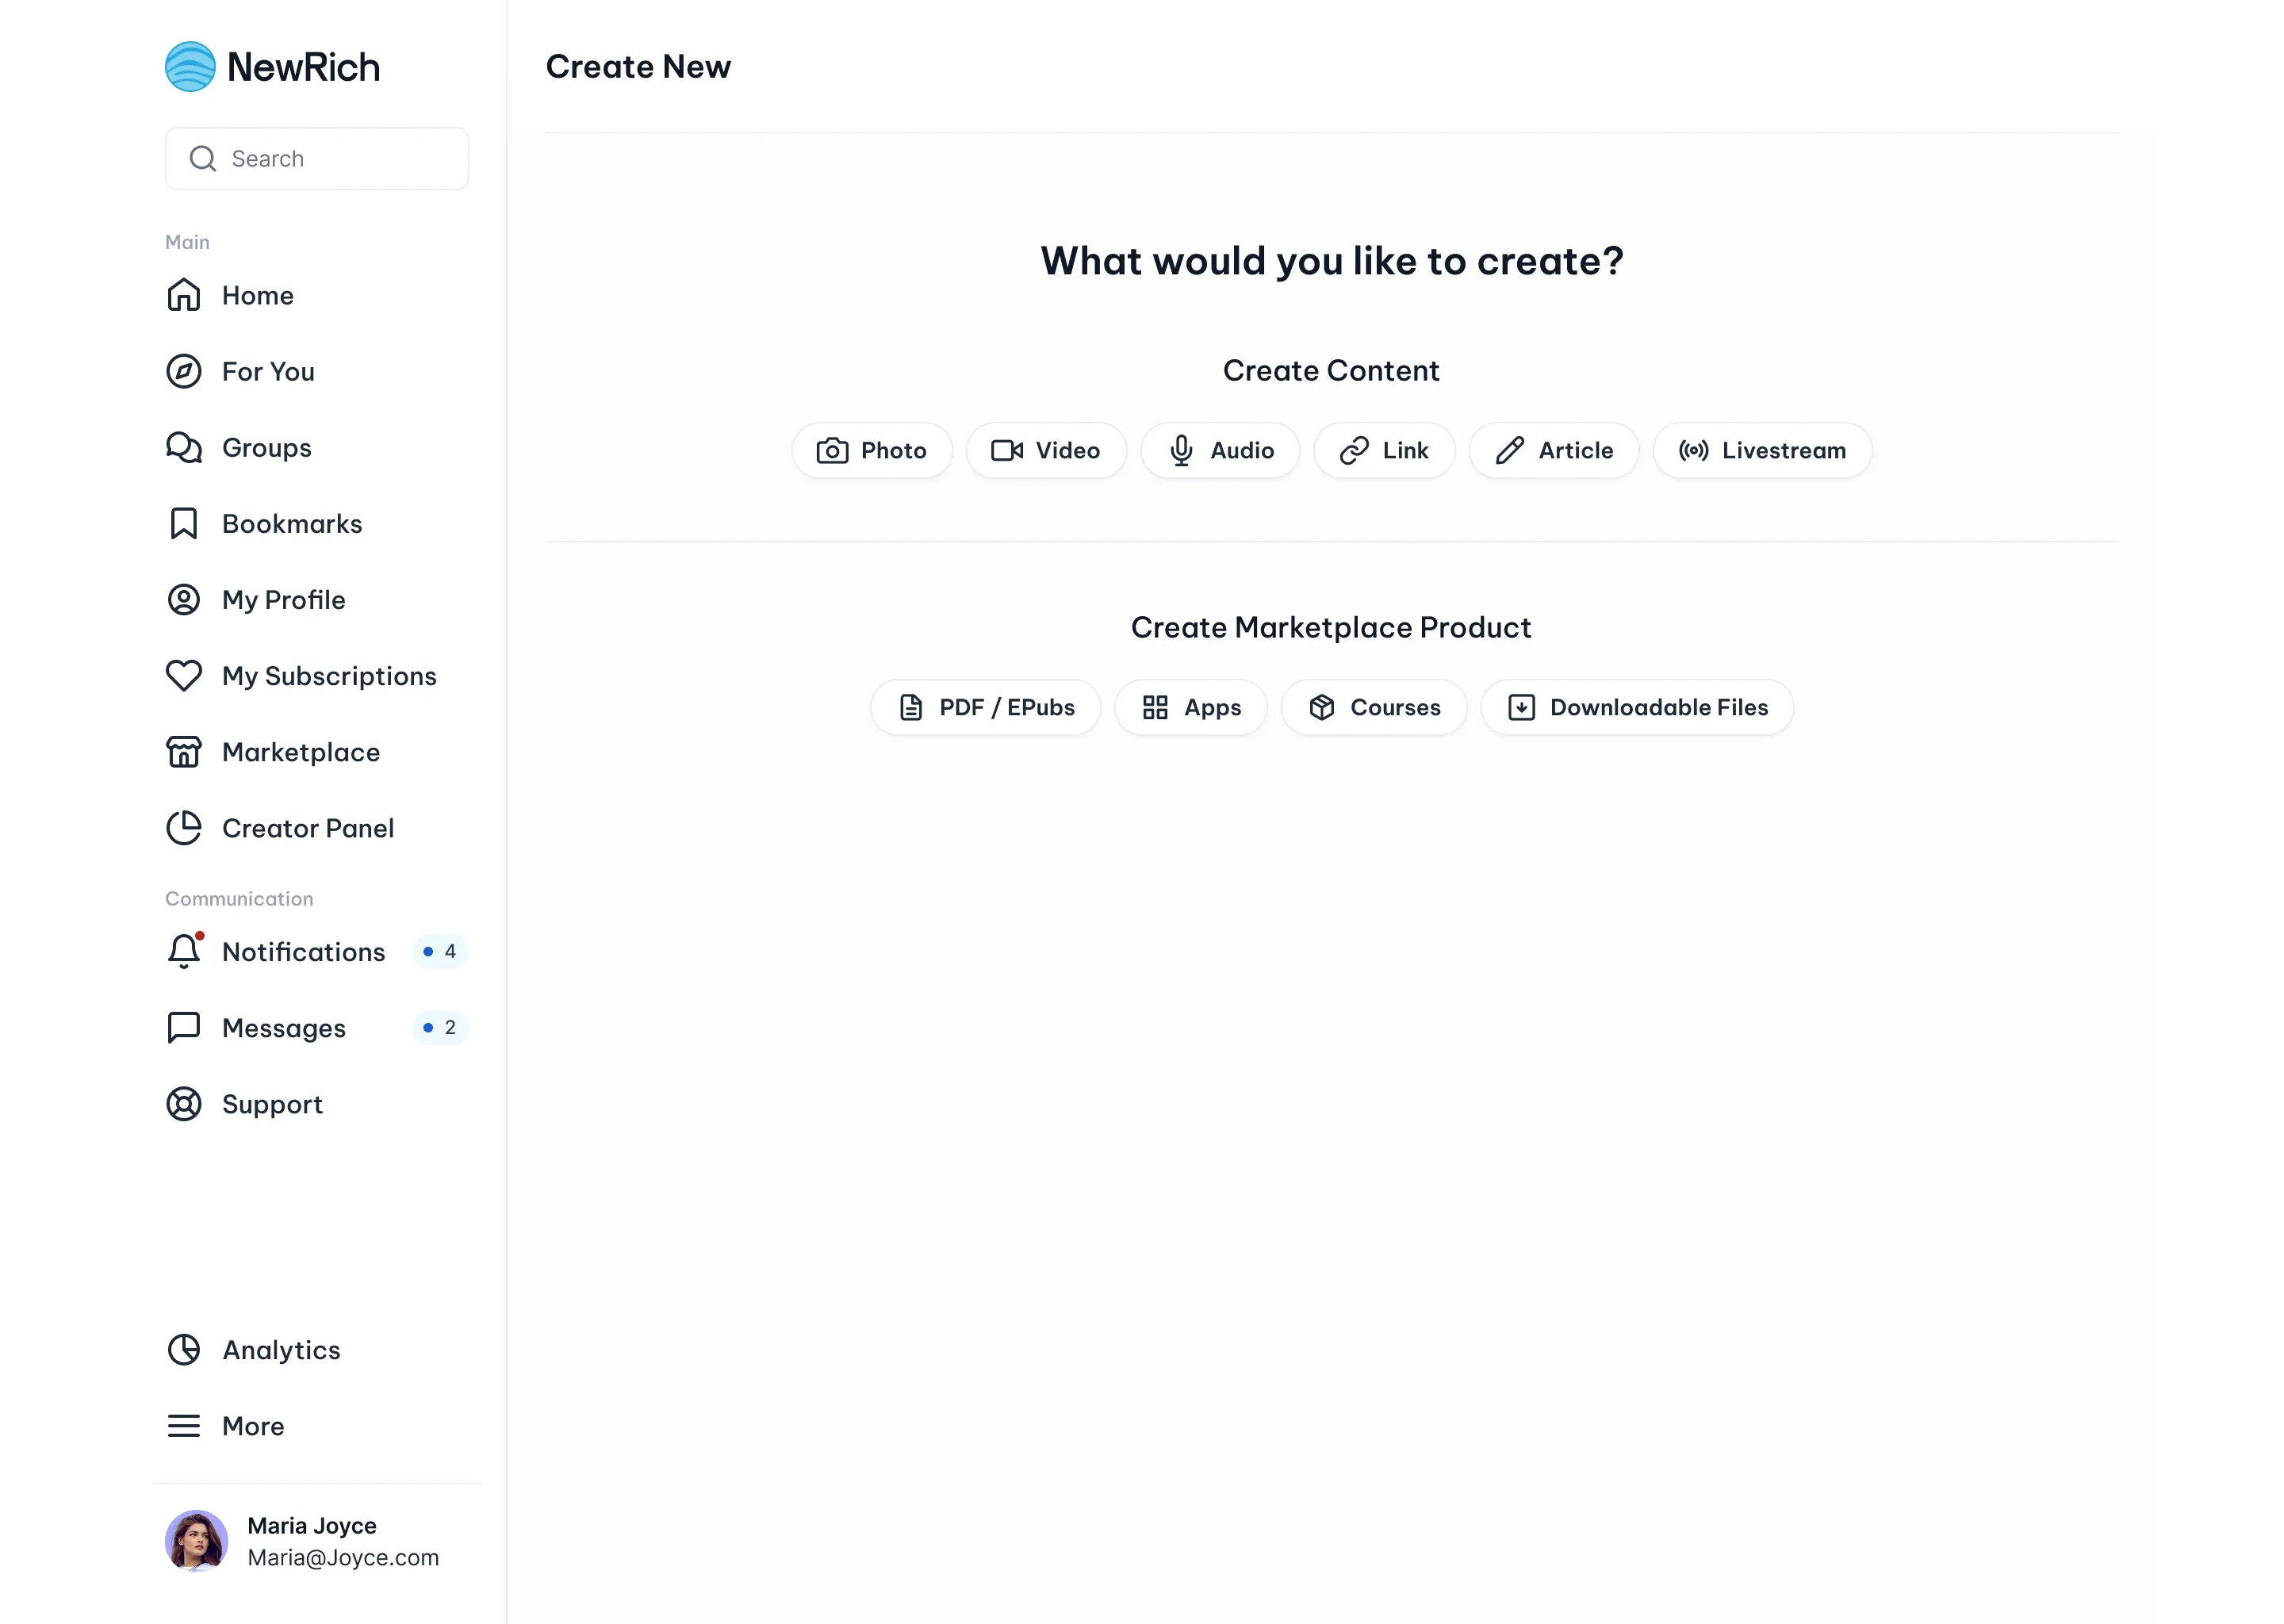
Step 1 — Basic Information
The first step is where you'll upload your Product's main content and provide the information that describes it.
Depending on the Product type, you can upload photos, videos, or audio files as the main content.
You'll also provide details such as the title, category, description, and tags. You can upload additional attachments and optionally enable Promote content to link this Product to another Product or Course.
Complete the following information:
- Upload the main content (if applicable)
- Enter a title
- Select a category
- Add a description
- Add tags
- (Optional) Upload additional attachments
- (Optional) Enable Promote content to link this Product to one of your Courses or Products
When you've finished, click Next step.
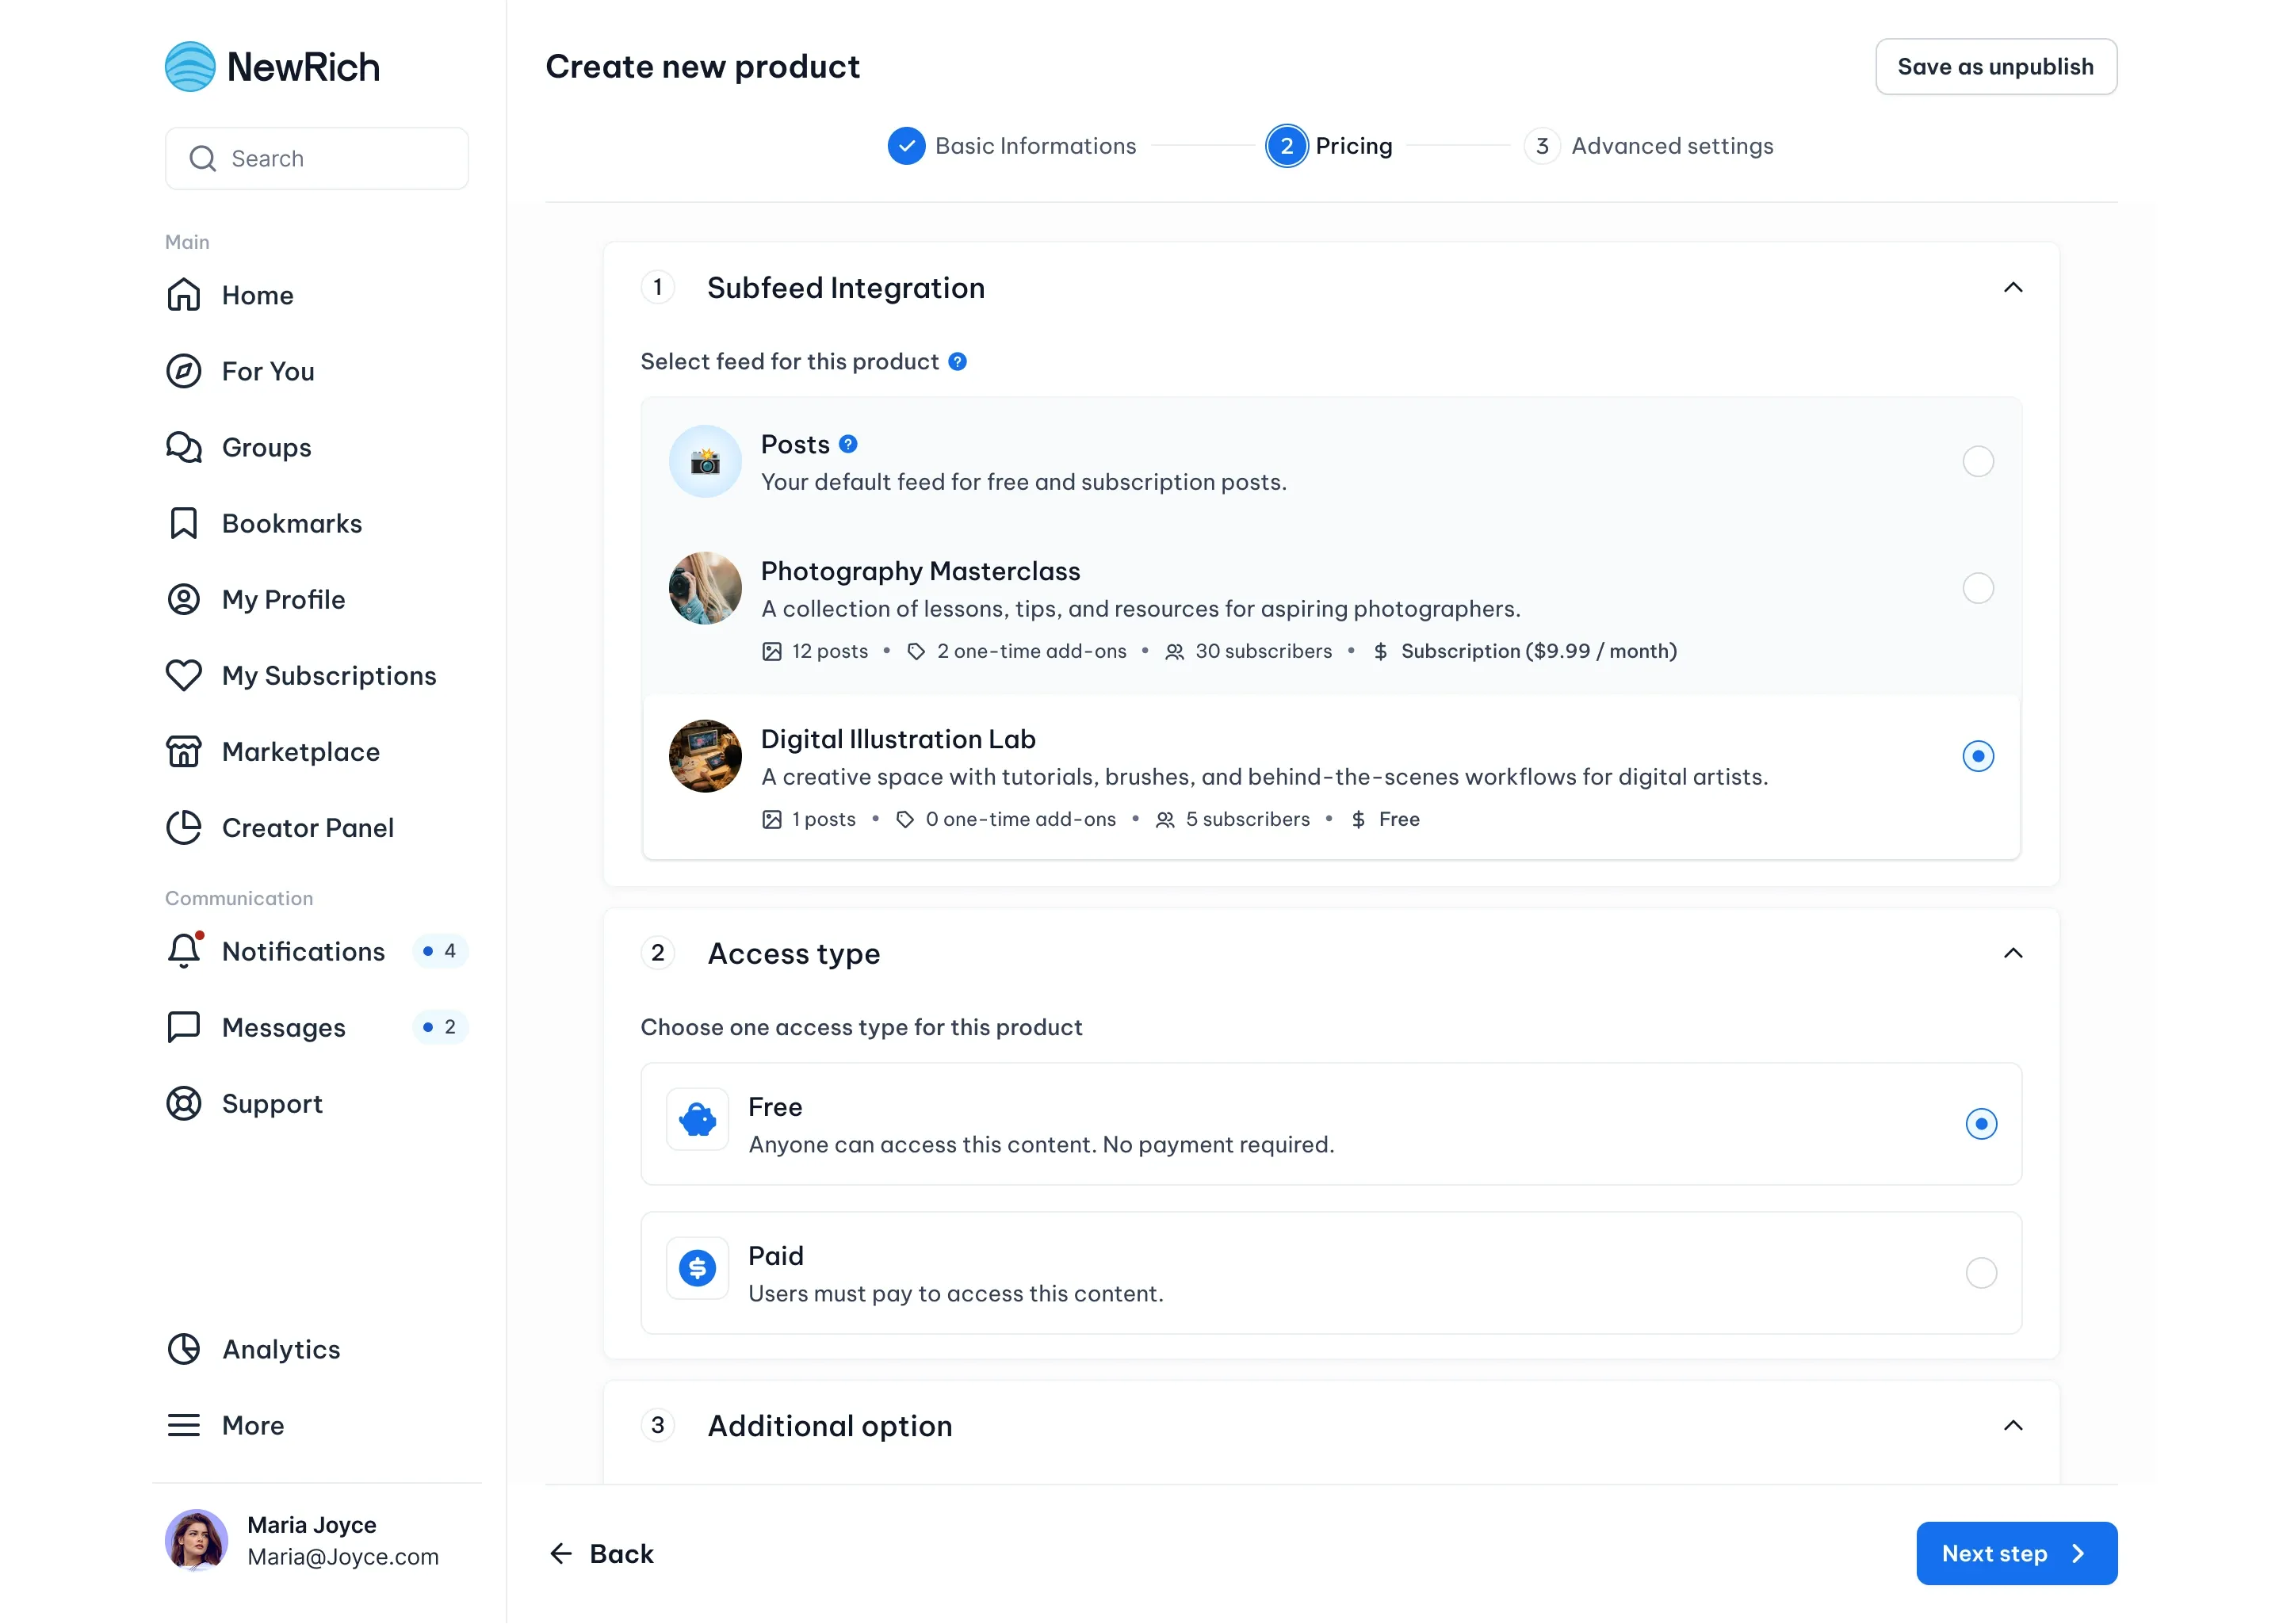
Step 2 — Pricing
In this step, you'll choose where your Product will be published and how users will access it.
First, select the Subfeed where the Product will appear.
Next, choose an Access type:
- Free - Anyone can access the Product without payment.
- Paid - Users must pay to access the Product.
When Paid is selected, you can configure one or both of the available payment options:
- One-time payment – Users purchase the Product once and keep permanent access.
- Included in subscription – Subscribers can access the Product as part of their active subscription.
Note: The available payment options depend on the selected Subfeed. Some options may be unavailable if the selected Subfeed doesn't support them.
If One-time payment is enabled, you can optionally offer the Product at a discounted price for a limited time.
When you've finished configuring the pricing, click Next step.
Step 3 — Advanced Settings
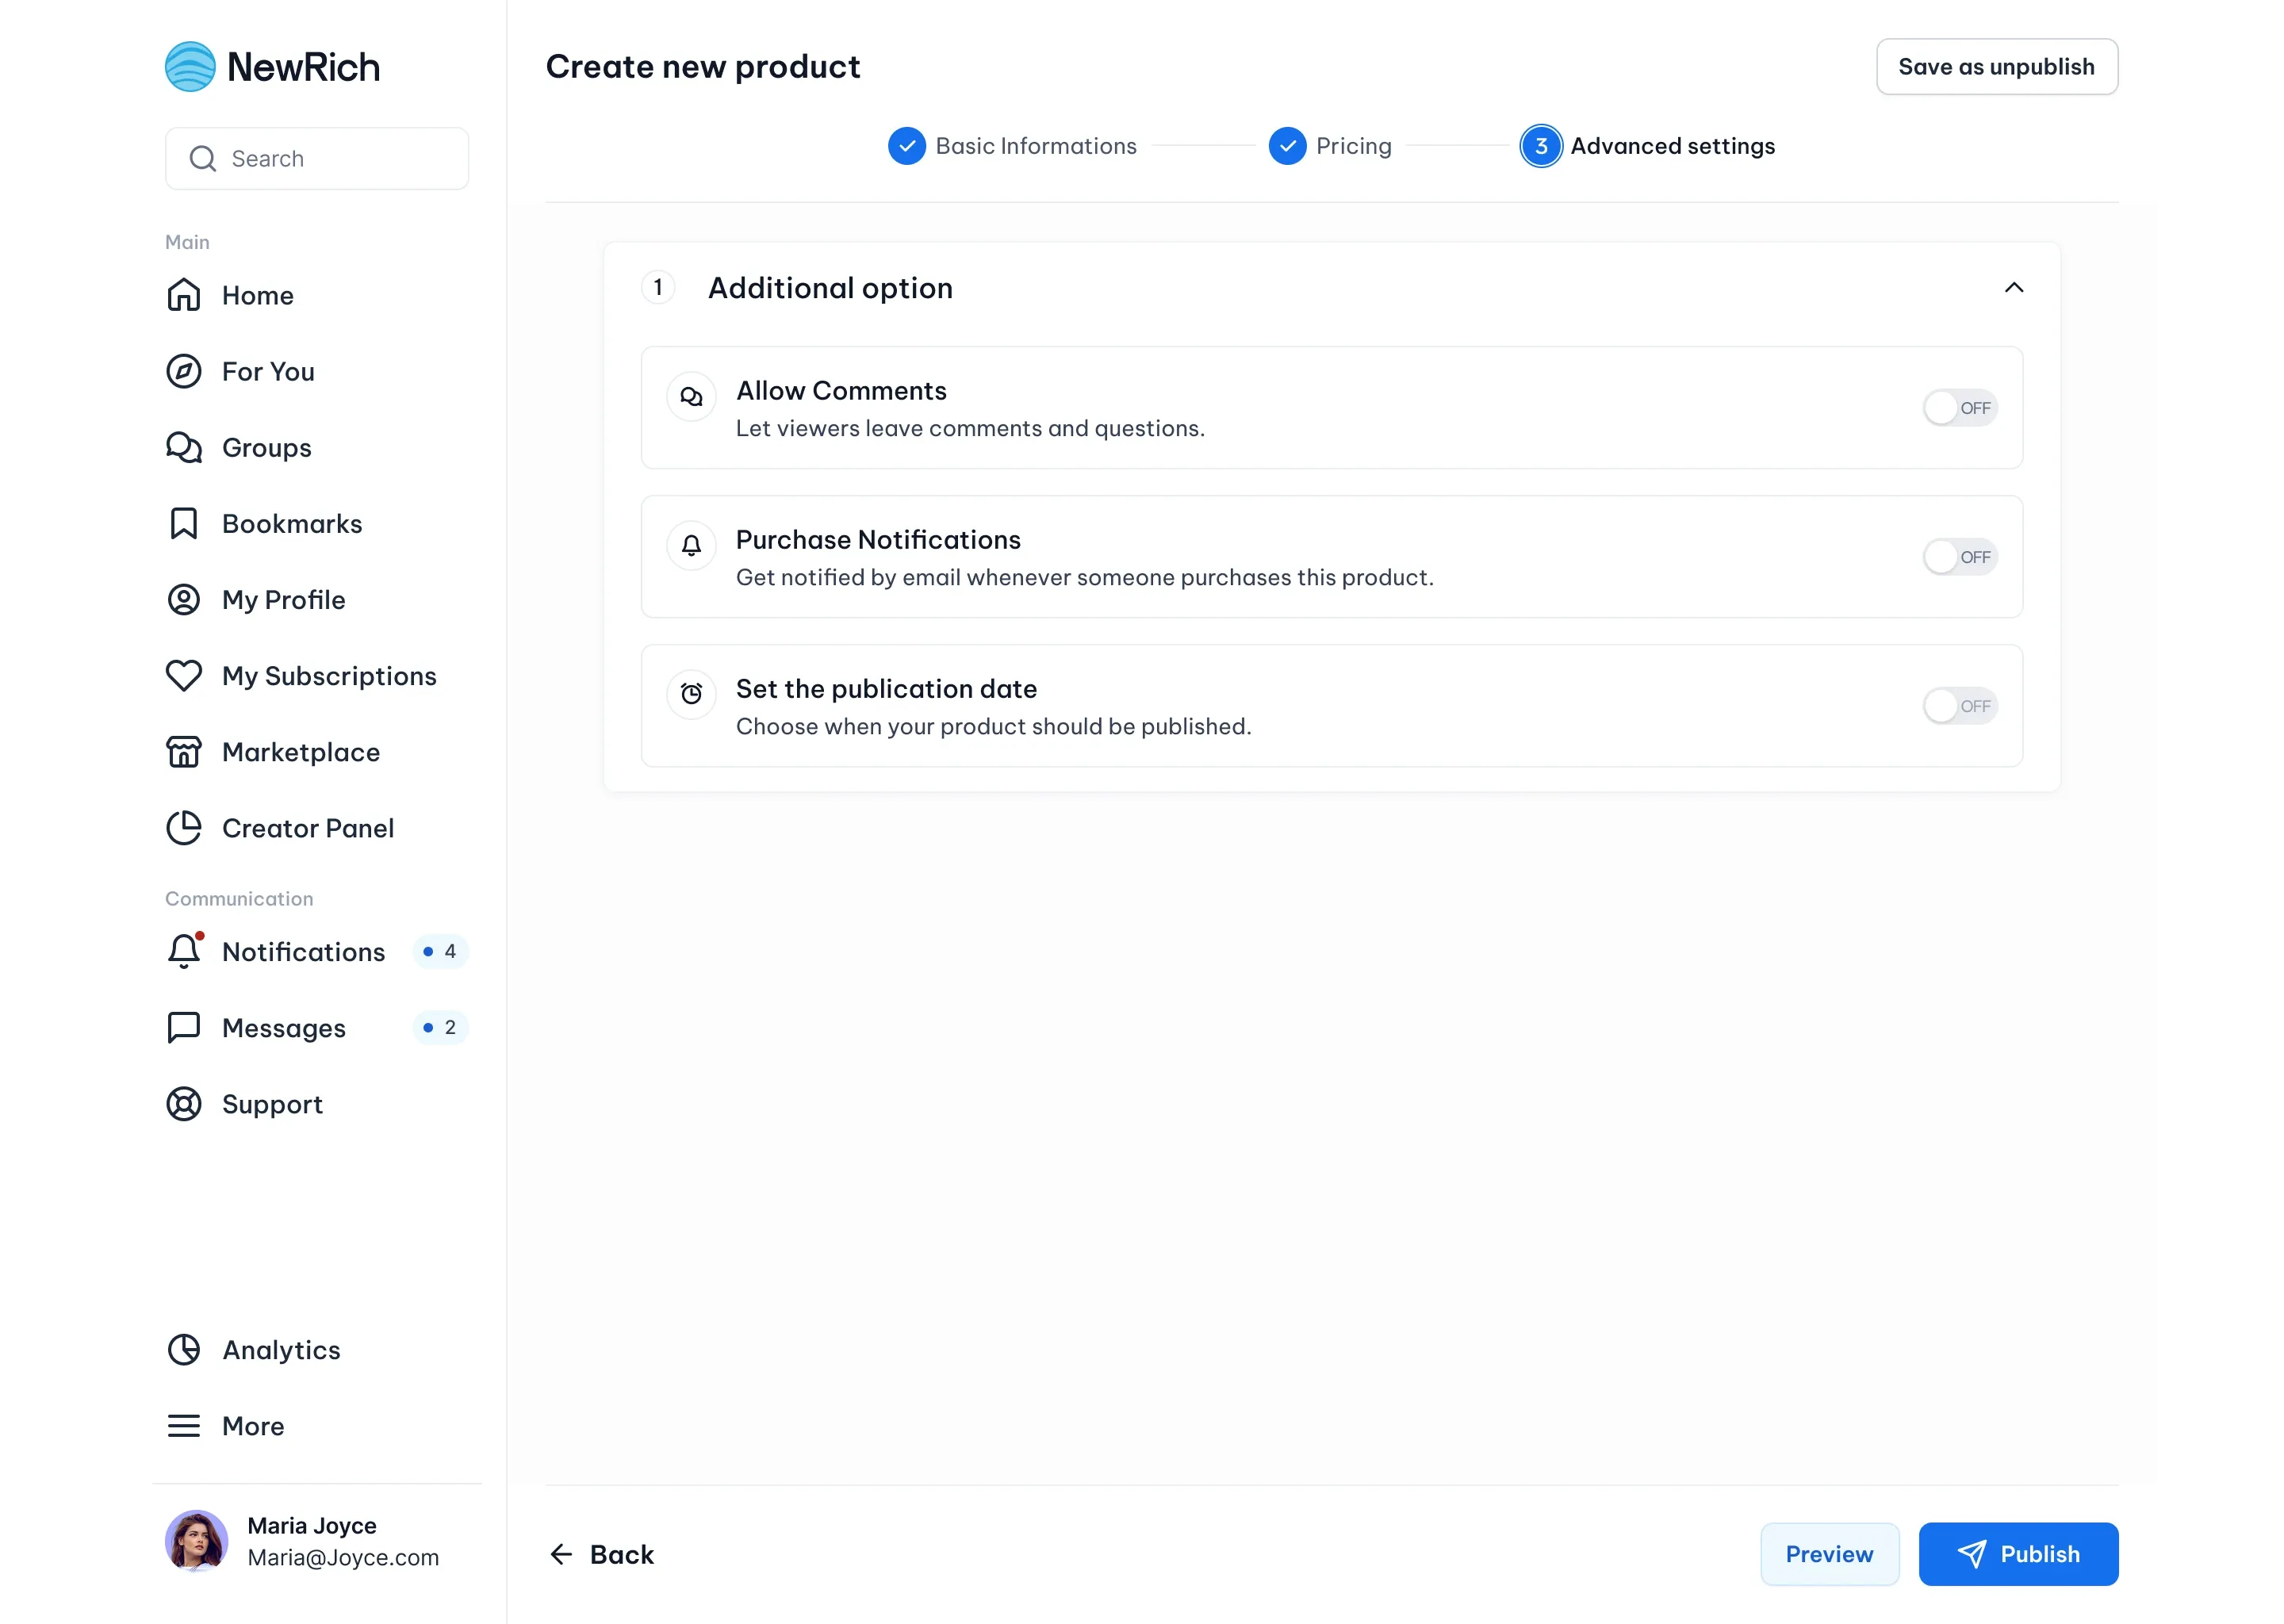
Before publishing, you can configure additional settings for your Product.
Available options include:
- Audio Preview (Audio Products only) - Allow potential buyers to listen to a preview of your audio before purchasing it.
- Allow Comments - Choose whether viewers can leave comments and questions on your Product.
- Purchase Notifications - Receive an email notification whenever someone purchases your Product.
- Set the Publication Date - Schedule your Product to be published automatically at a future date.
After configuring the desired settings:
- Review your Product using Preview.
- Click Publish to make it available to your audience.
Once your Product has been published, it will appear in the selected Subfeed using the access settings you've configured. You can edit its content, pricing, and publishing settings at any time from the Product settings page.