
Marketplace setup guide
Marketplace Setup Guide
The Marketplace Setup Wizard helps creators publish digital products on NewRich. Because every product type has different requirements, each one uses its own dedicated creation flow.
After selecting a product type, the setup wizard displays only the fields and options relevant to that product, making the publishing process faster and easier to complete.
Products can be saved as drafts at any time before being submitted for review.
Creating a Product
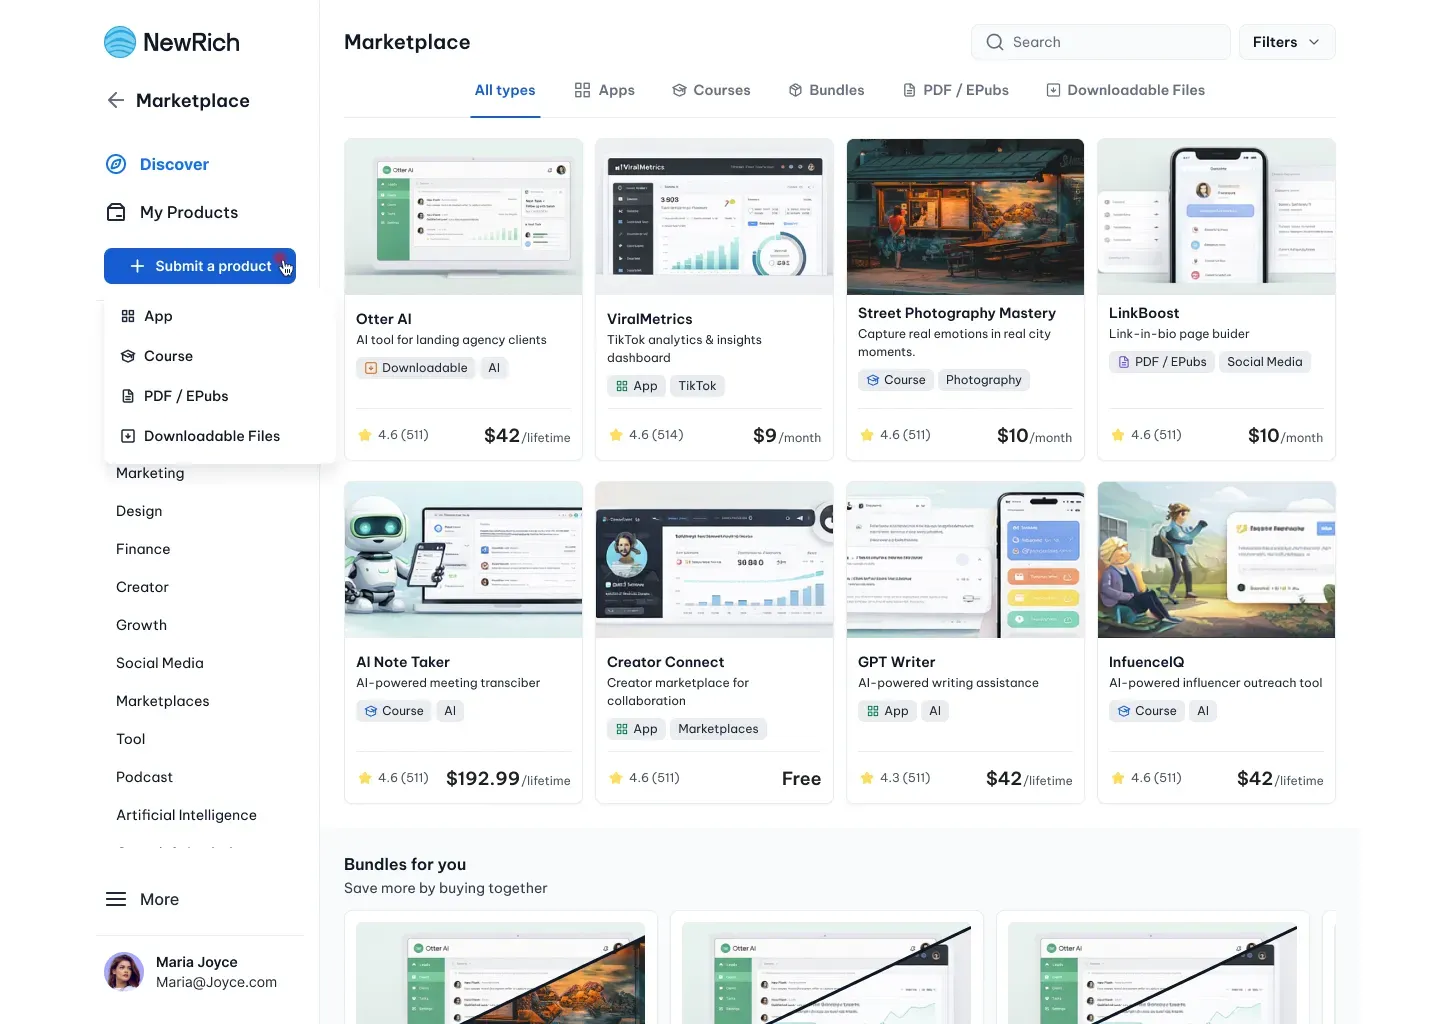
To publish a new product, click Submit a Product in the Marketplace.
First displays a list of supported product types. Each product type launches its own dedicated creation flow, tailored to the information and settings required for that specific offering.
Available product types include:
- App
- Course
- PDF / E-book
- Downloadable File
Once a product type is selected, the corresponding setup wizard opens and guides you through the entire publishing process.
App Creation Flow
The App Creation Flow guides creators through the process of publishing applications, software, AI tools, templates, and other interactive digital products in the Marketplace.
Each step focuses on a specific part of your product setup, from basic information and pricing to delivery options and final review. The wizard automatically displays only the fields relevant to the selected product configuration, making the publishing process simple and efficient.
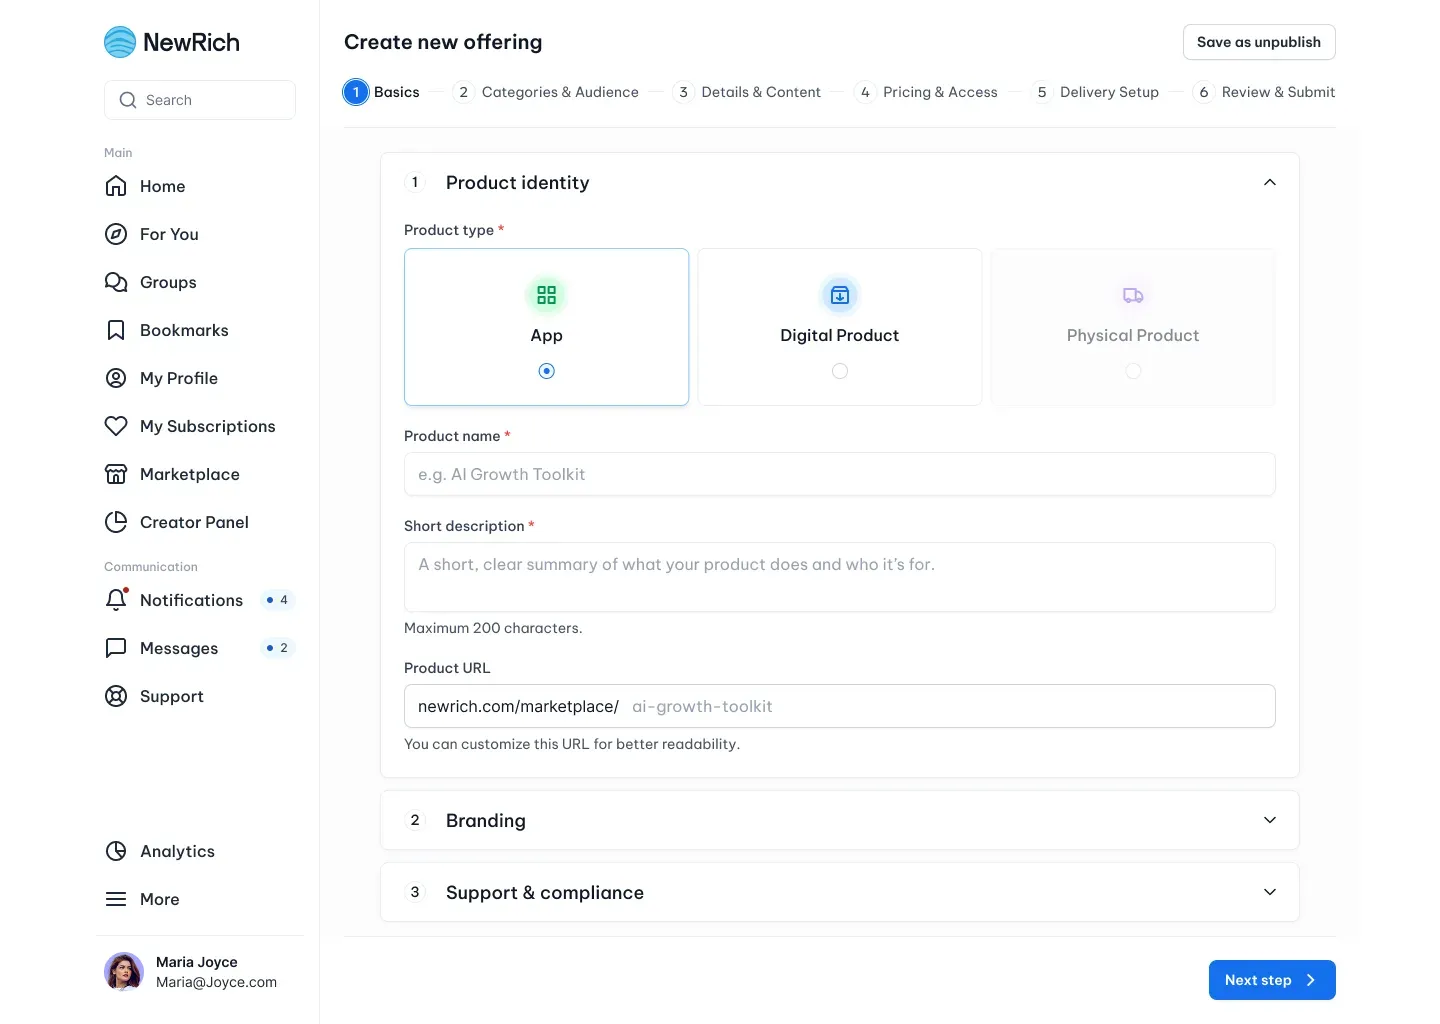
Step 1 — Product Basics
Start by creating the foundation of your Marketplace listing. This step defines the information customers see before opening your product page and helps them quickly recognize your offering.
Here you can provide your product name, short description, branding assets such as a cover image and logo, and support information. These details form the basic identity of your product throughout the Marketplace.
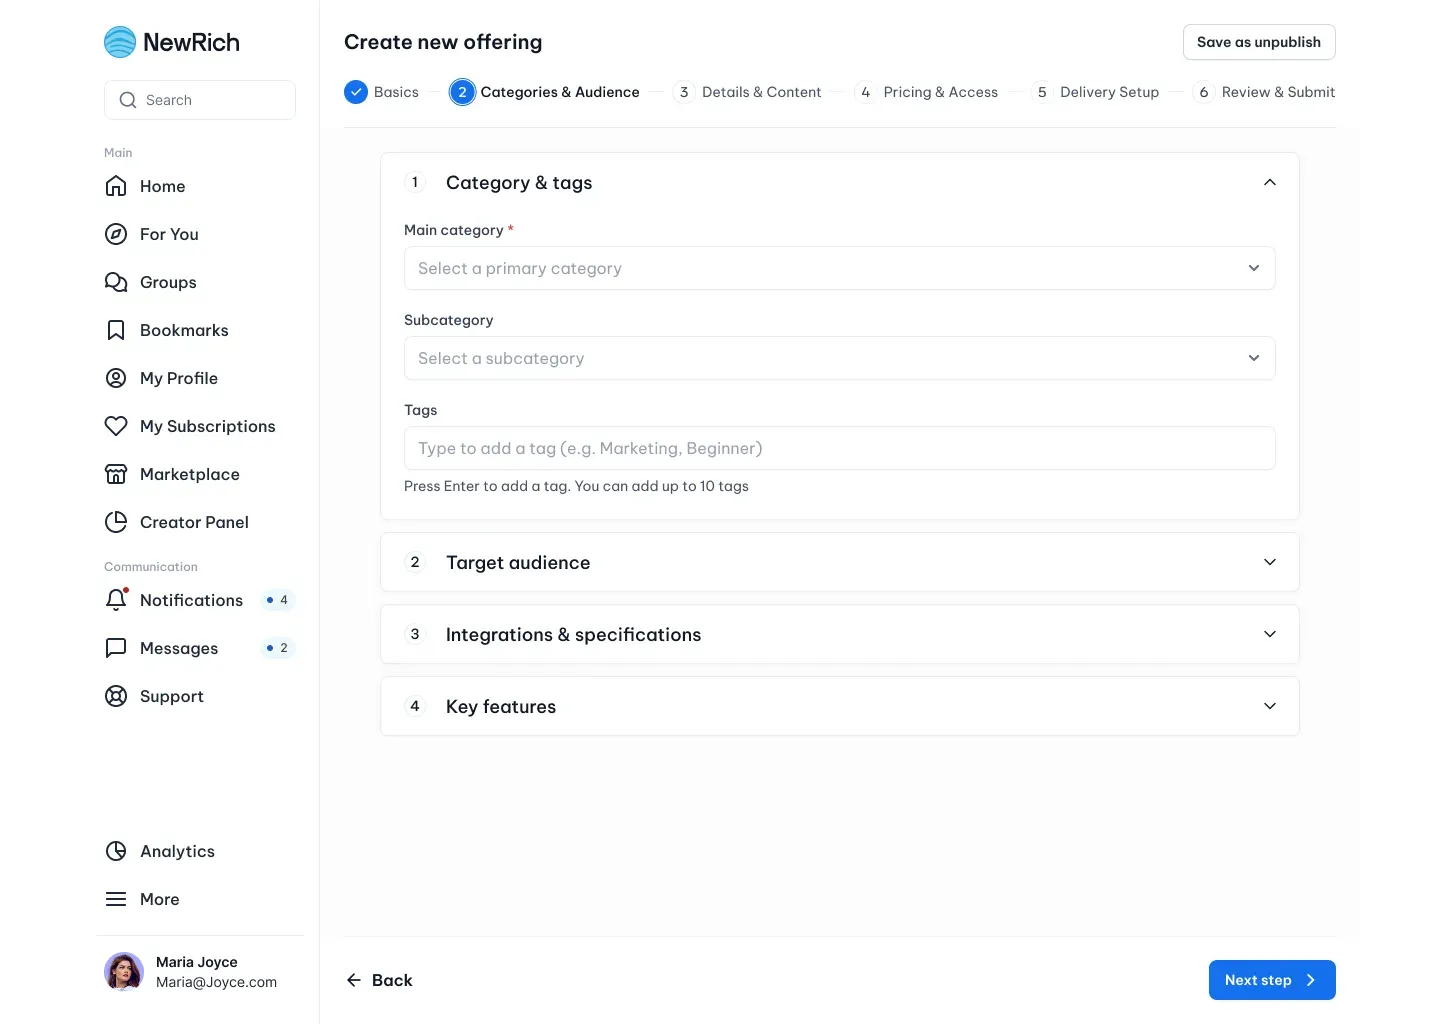
Step 2 — Categories & Audience
Help customers discover your product by organizing it into the most relevant categories.
This step allows you to describe who the product is designed for by selecting categories, tags, target audiences, key features, and technical specifications. Providing accurate information improves search visibility and helps customers quickly understand whether the product matches their needs.
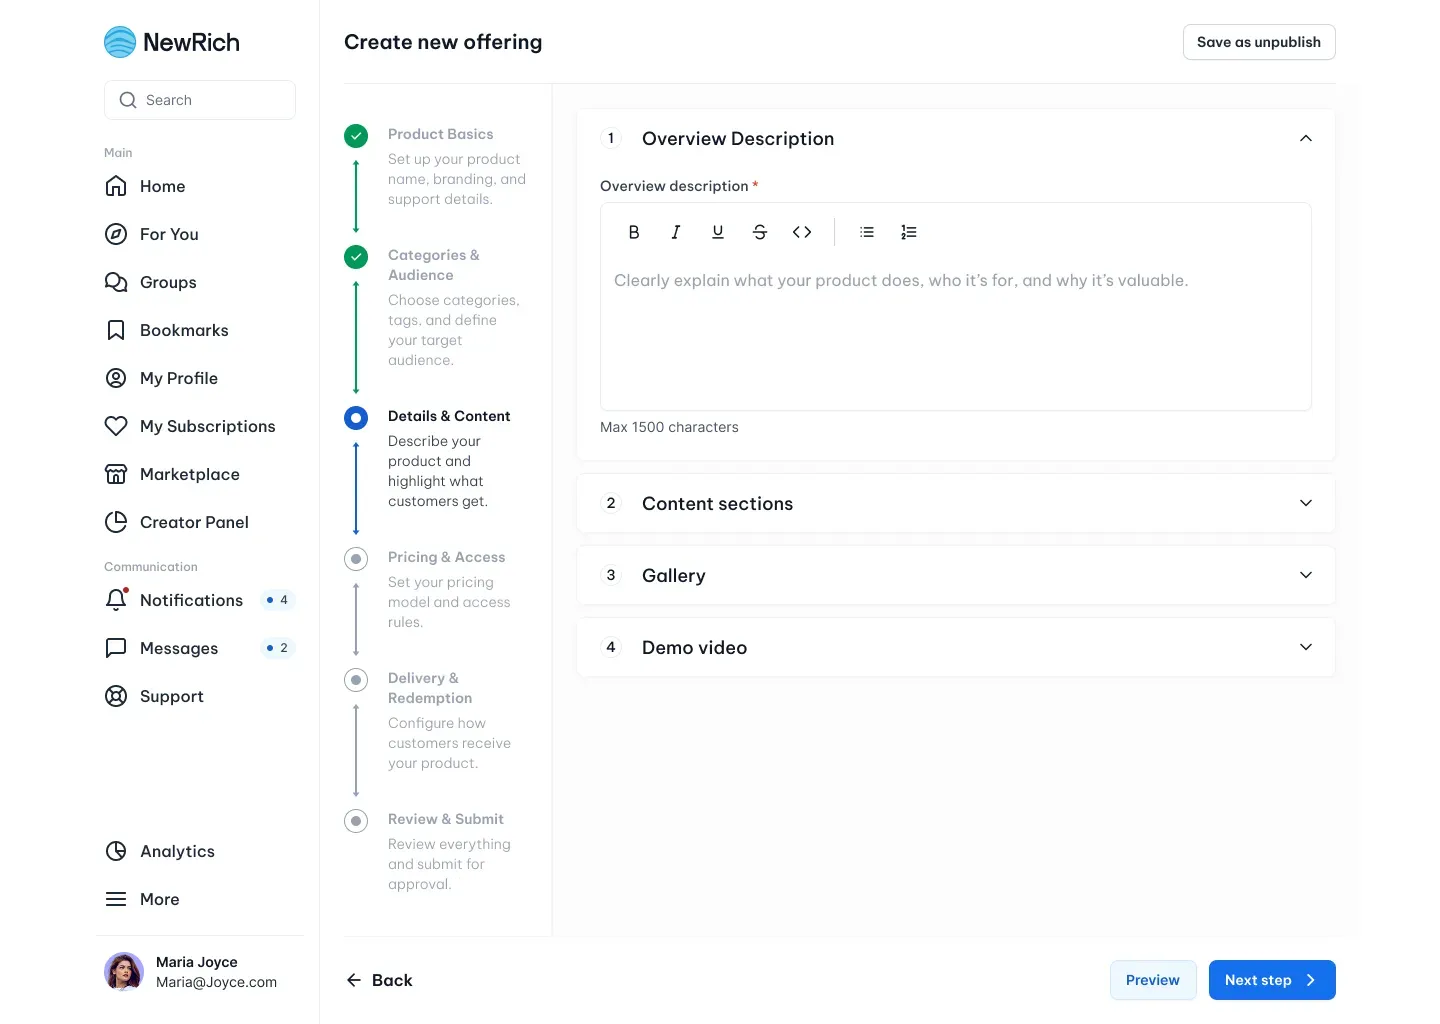
Step 3 — Product Details
This step is dedicated to building your Marketplace product page.
Here you can add detailed descriptions, screenshots, image galleries, videos, and additional content sections that explain your product, demonstrate its features, and showcase the value customers will receive after purchase.
The available content sections may vary depending on the selected product type.
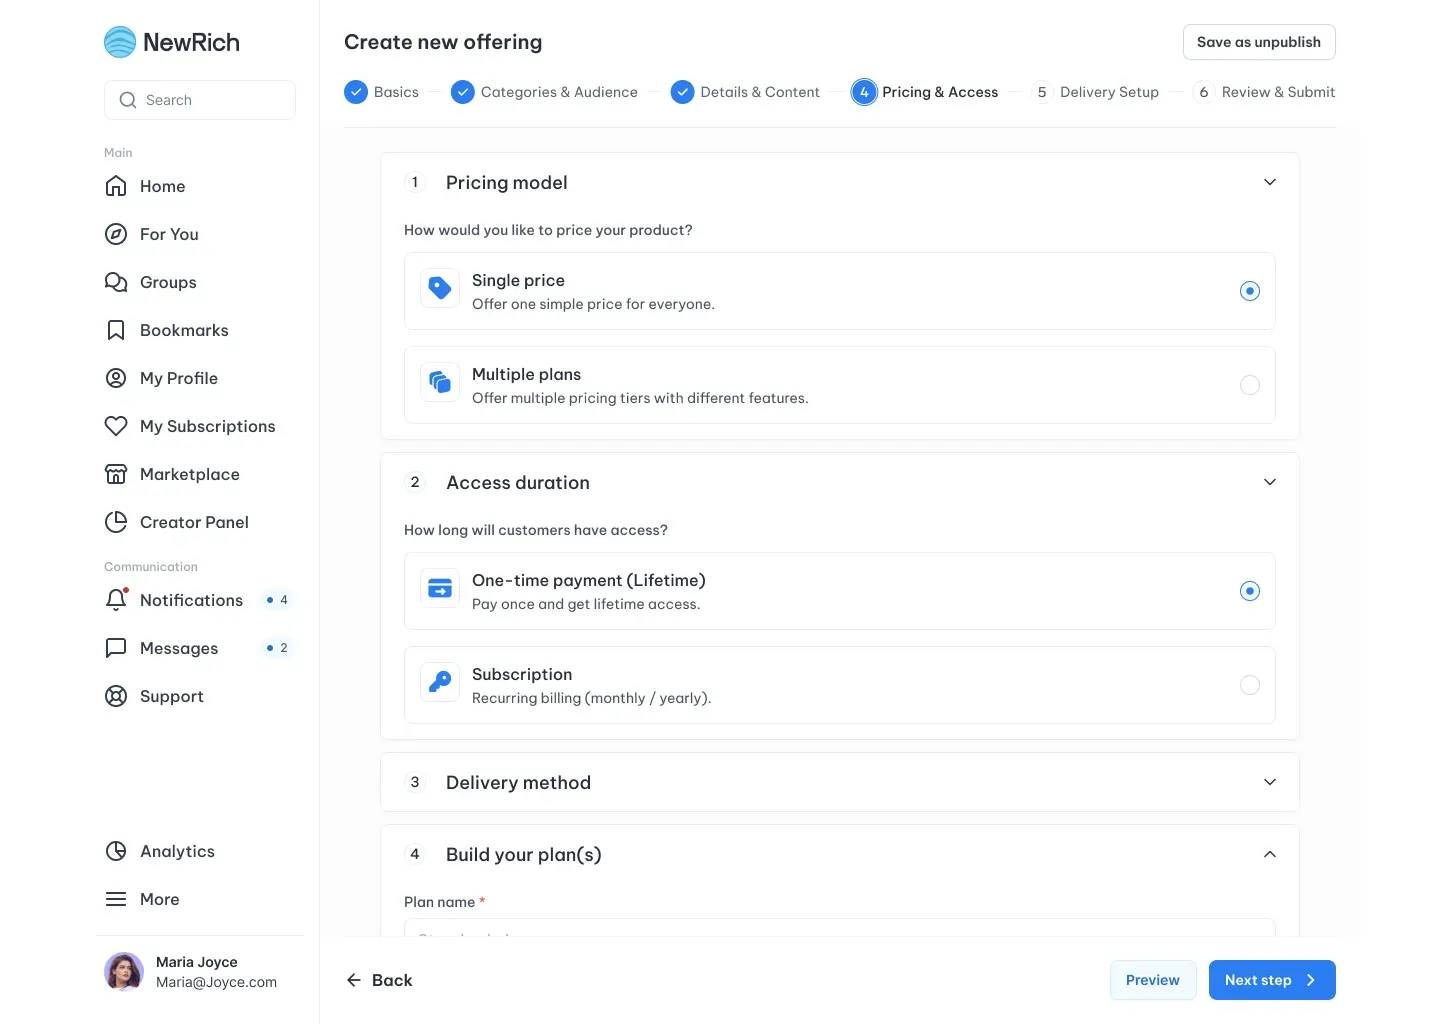
Step 4 — Pricing & Access
Define how customers can purchase and access your product.
Depending on your pricing strategy, you can offer a one-time purchase, recurring subscription, multiple pricing plans, or other supported pricing models. The available options automatically adjust based on the configuration selected for your product.
Step 5 — Delivery & Access
Choose how customers receive their purchase after completing payment.
Depending on the type of product you're publishing, NewRich can deliver access through downloadable files, in-platform content, redemption codes, license activation, or other supported delivery methods. Only compatible delivery options are displayed during setup.
Step 6 — Review & Submit
Before publishing, review your product to ensure everything is complete and ready for customers.
You can preview the final Marketplace listing, return to any previous step to make changes, save your progress as a draft, or submit the product for review. Once approved, your product becomes available in the Marketplace for customers to purchase.
Tip
The App Creation Flow dynamically adapts to the selected product configuration, displaying only the options required for your pricing model, delivery method, and product settings. This keeps the setup process focused while giving creators full flexibility when publishing their products.
Course Creation Flow
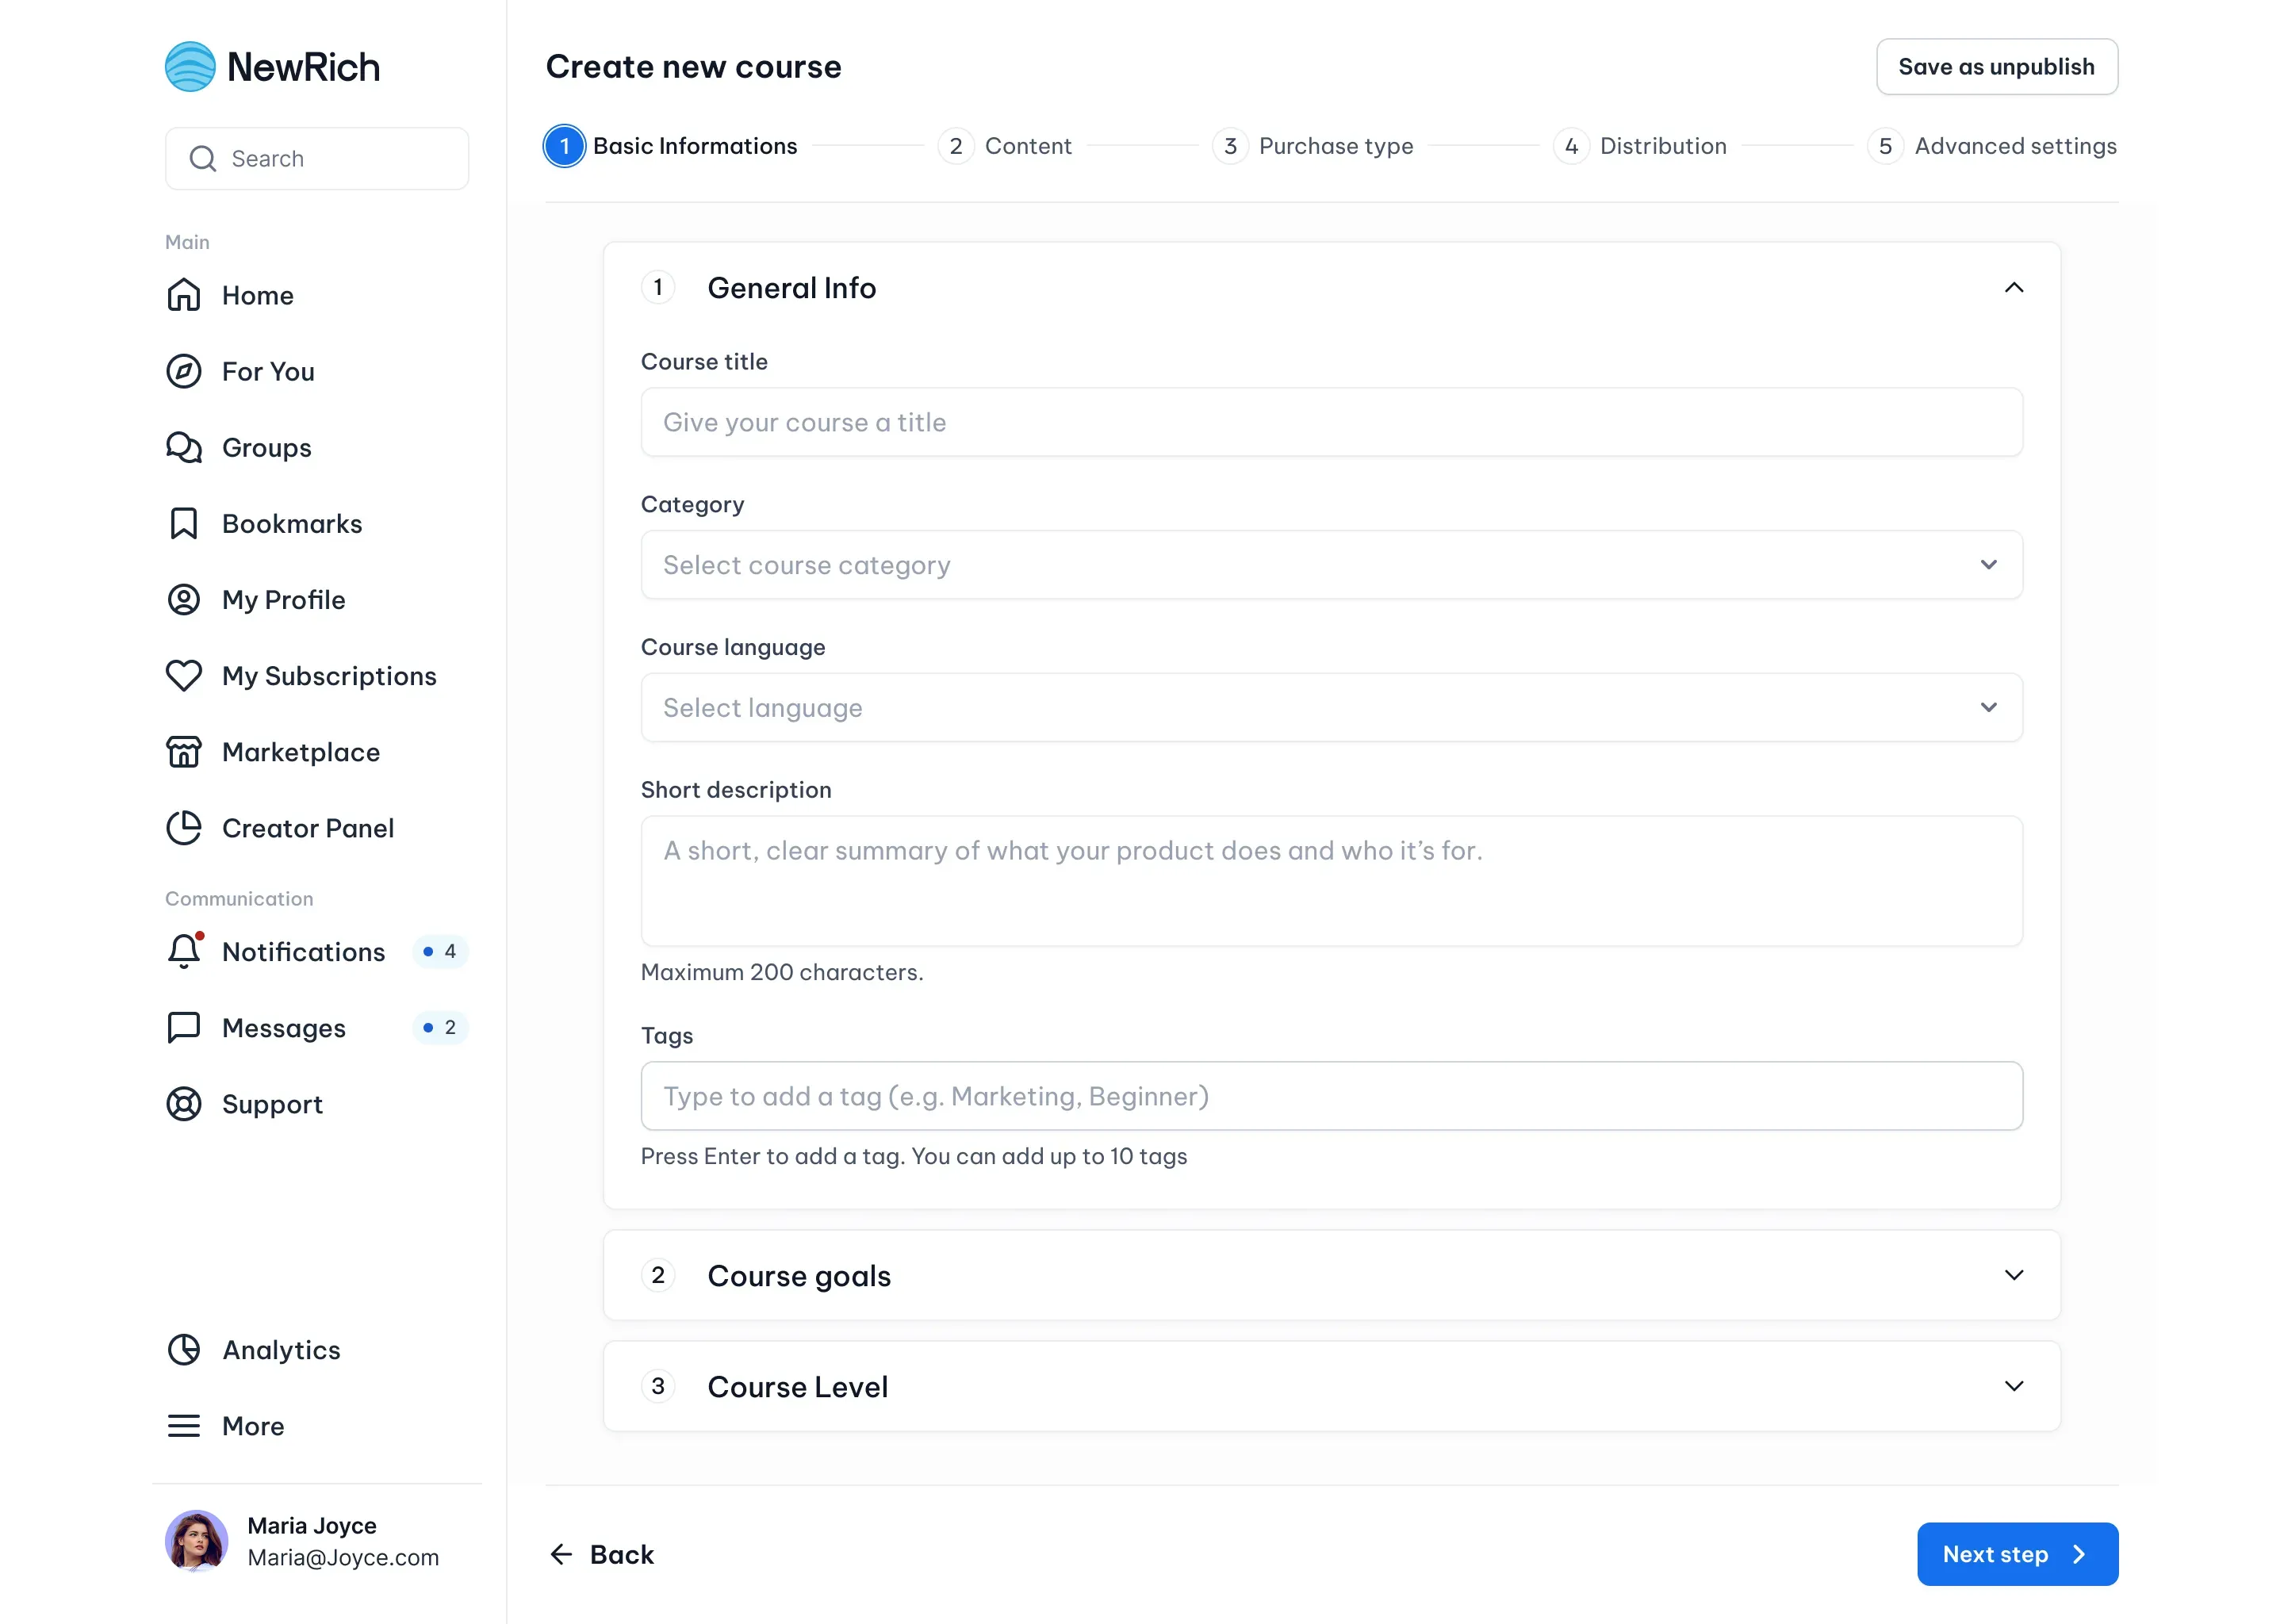
Courses use a dedicated creation wizard designed specifically for educational content. Because course publishing includes features such as curriculum management, lesson creation, learning materials, student access, and progress tracking, the complete setup process is documented separately.
To learn how to create and publish a course, see the Course Creation Guide.
PDF / ePub Creation Flow
To publish a PDF or ePub in the Marketplace, select PDF / ePub from the Submit a Product menu.
The PDF / ePub creation wizard walks you through the complete publishing process, from adding your document details and uploading the file to configuring pricing, distribution, and publishing options. Each step focuses on a different part of preparing your product for customers.
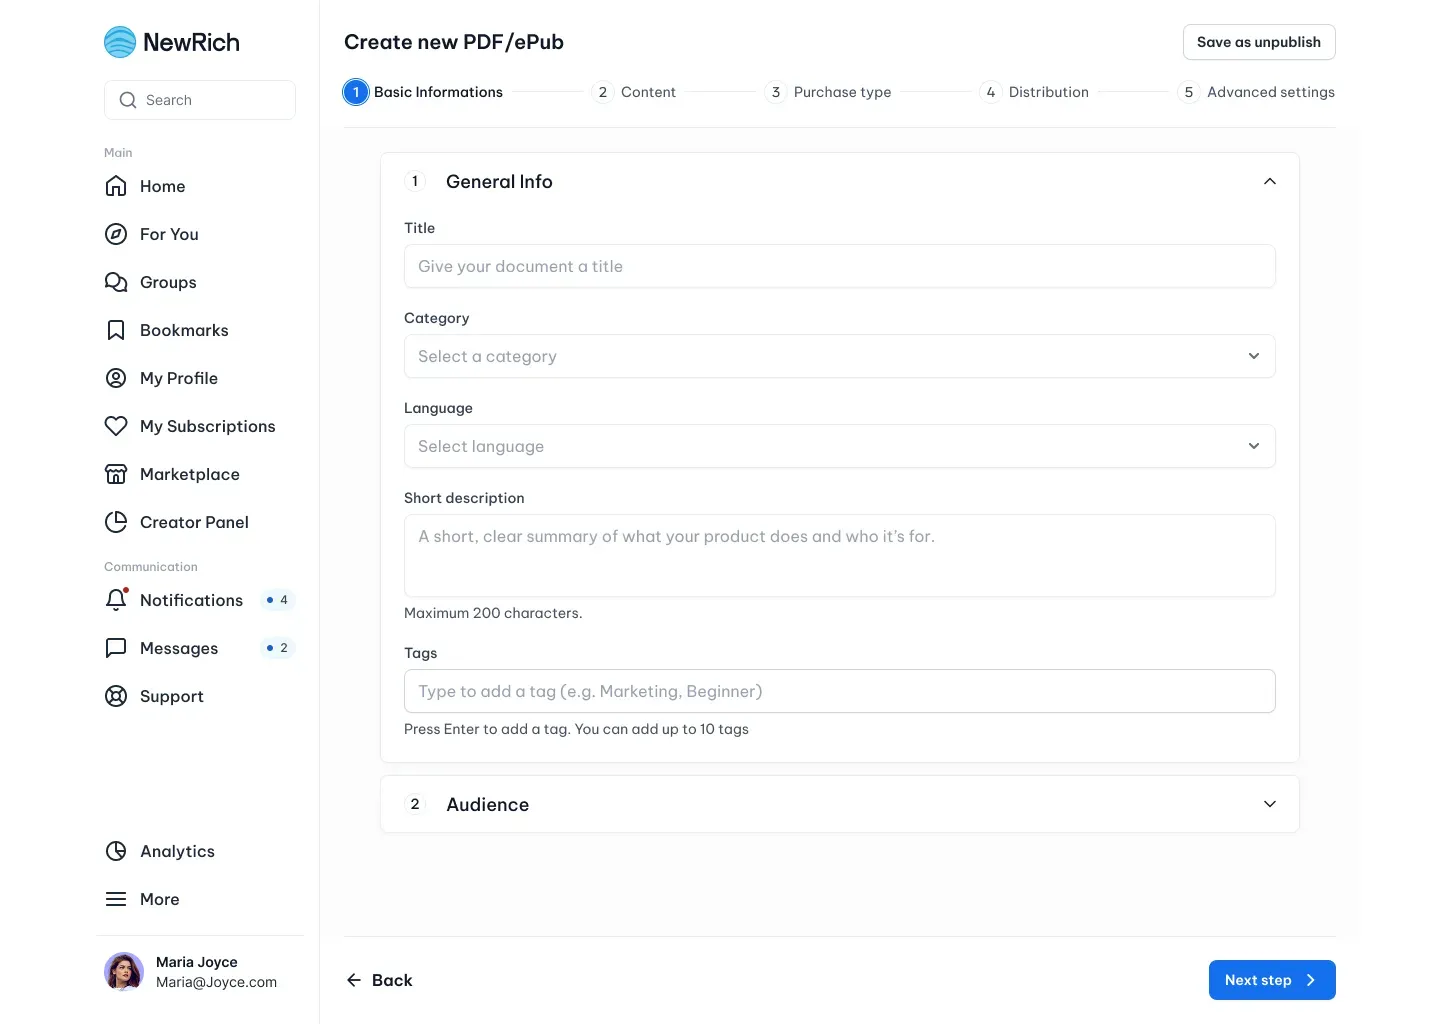
Step 1: Basic Information
Begin by defining the core information about your document. Add the title, category, language, description, and tags, then describe who the document is for and what readers will gain from it.
This information helps customers understand your document and improves its visibility in the Marketplace.
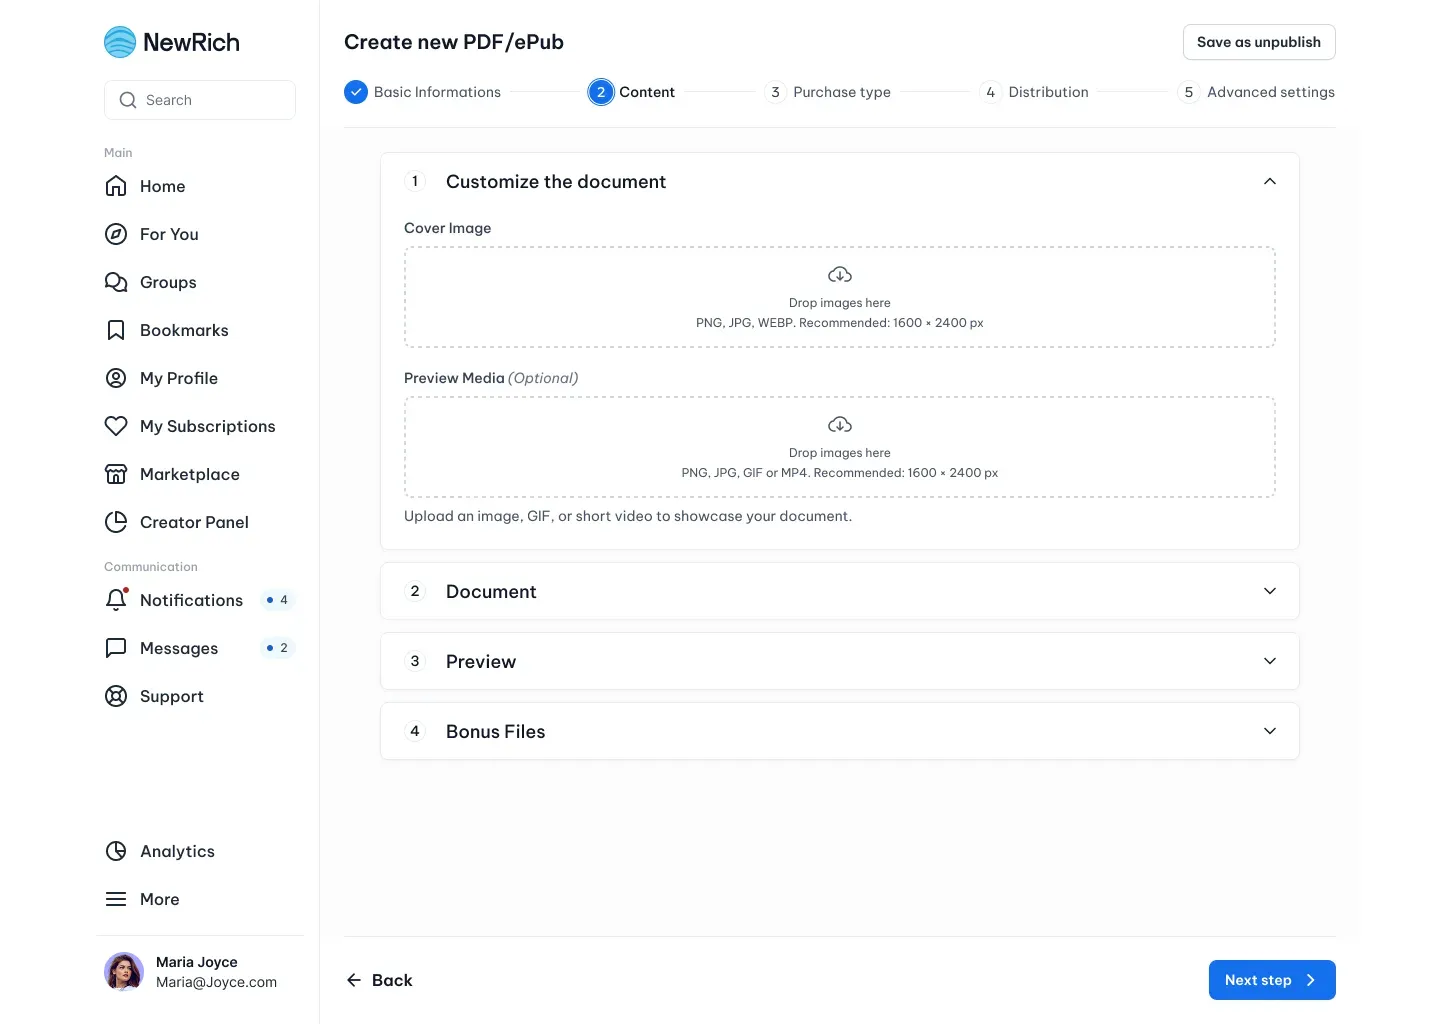
Step 2: Content
Next, upload and customize your document. Add a cover image, optional preview media, and the PDF or ePub file itself, then provide a detailed description of the content.
You can also choose whether customers can preview the first pages before purchasing and include optional bonus files such as templates or additional resources.
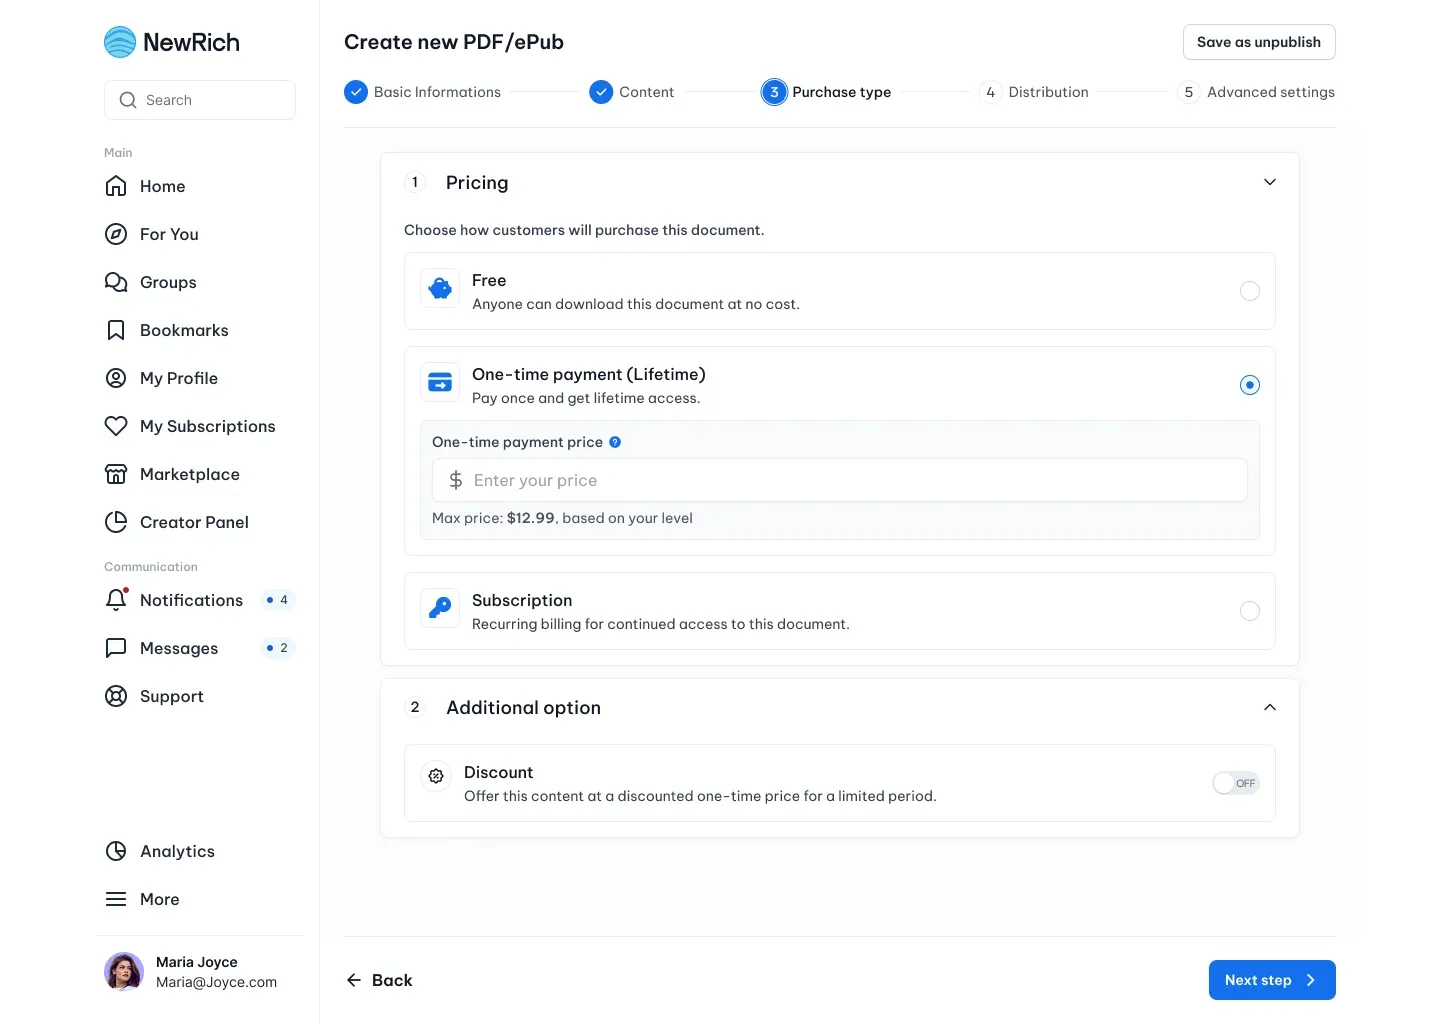
Step 3: Purchase Type
Choose how customers will access your document. You can offer it for free, sell it as a one-time purchase, or make it available through a subscription with different billing frequencies.
You can also configure promotional discounts for one-time purchases.
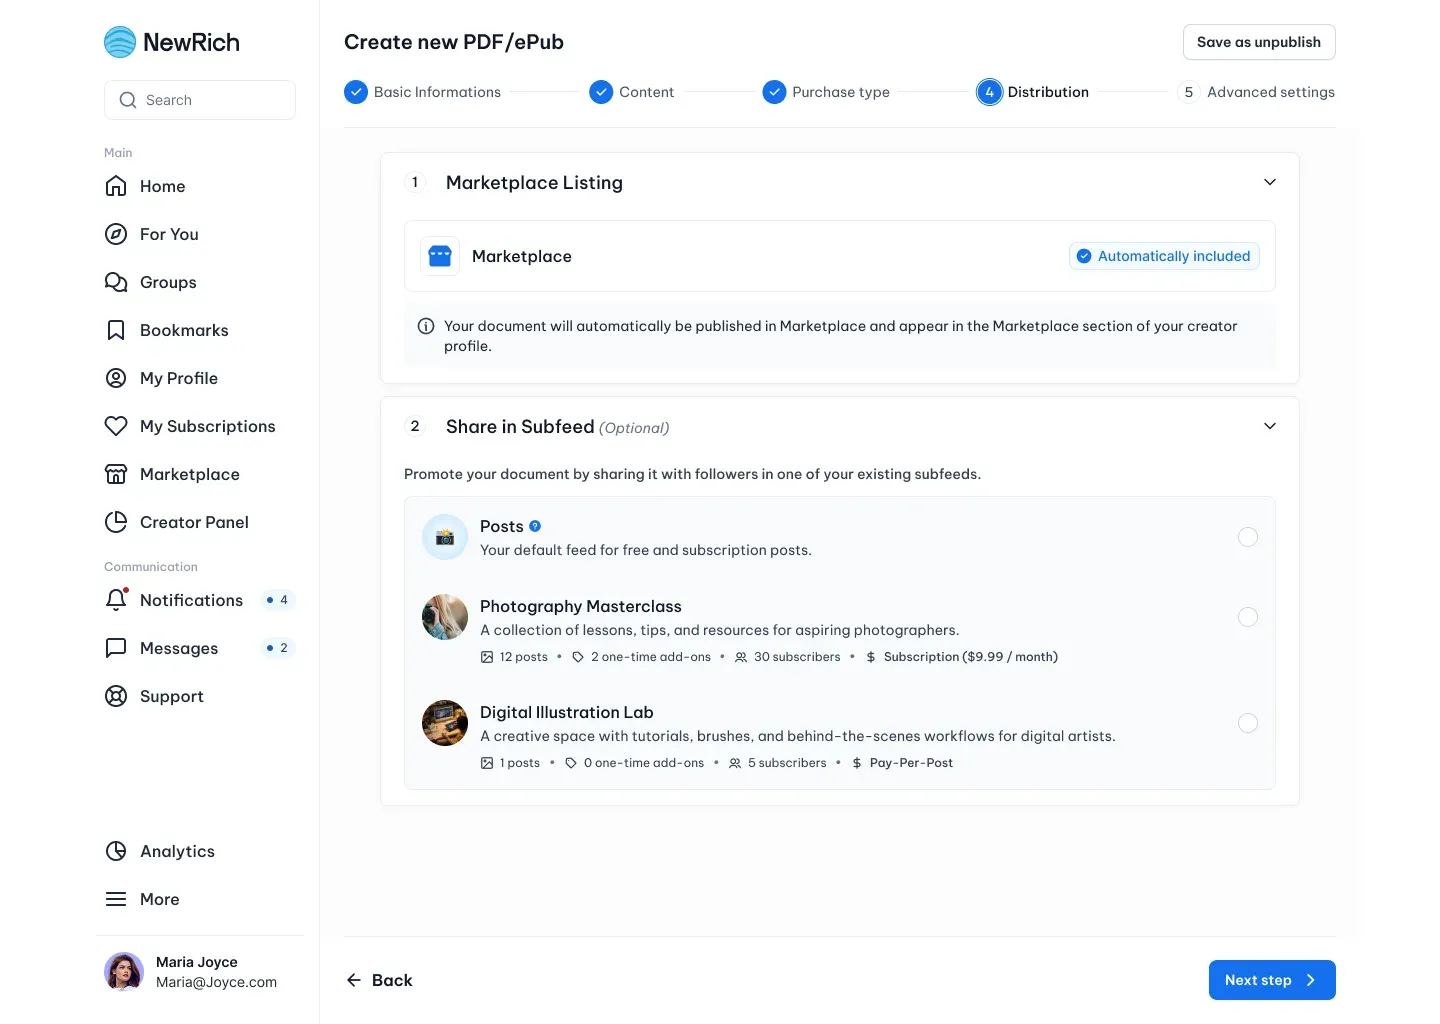
Step 4: Distribution
Choose where your document will appear after publishing. Every document is automatically listed in the Marketplace and on your creator profile.
Optionally, you can also promote it by sharing it in one of your existing Subfeeds.
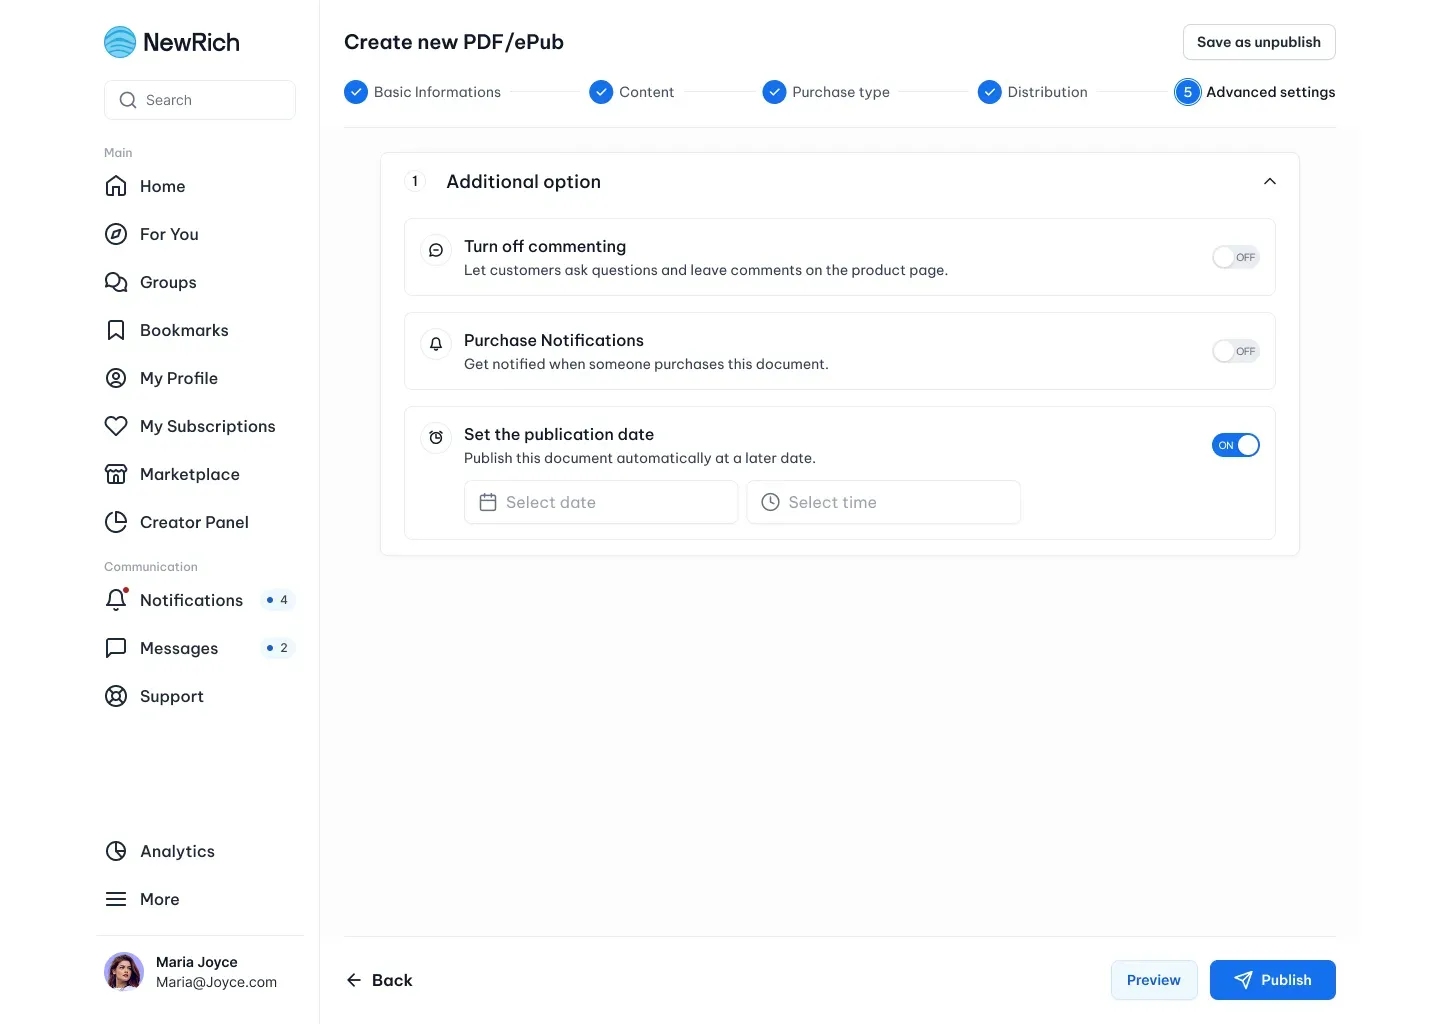
Step 5: Advanced Settings
Before publishing, configure optional settings such as comments, purchase notifications, and scheduled publishing.
These options give you more control over how and when your document becomes available.
Publishing Your Document
Once everything is ready, review your setup, preview the Marketplace listing, and choose whether to save the document as a draft, schedule its release, or publish it immediately.
After publishing, your PDF or ePub becomes available to customers through the Marketplace and any selected distribution channels.
Downloadable Files Creation Flow
To publish a downloadable product in the Marketplace, select Downloadable Files from the Submit a Product menu.
The creation wizard guides you through each step, from describing your product and uploading the files to configuring pricing, distribution, and publishing settings.
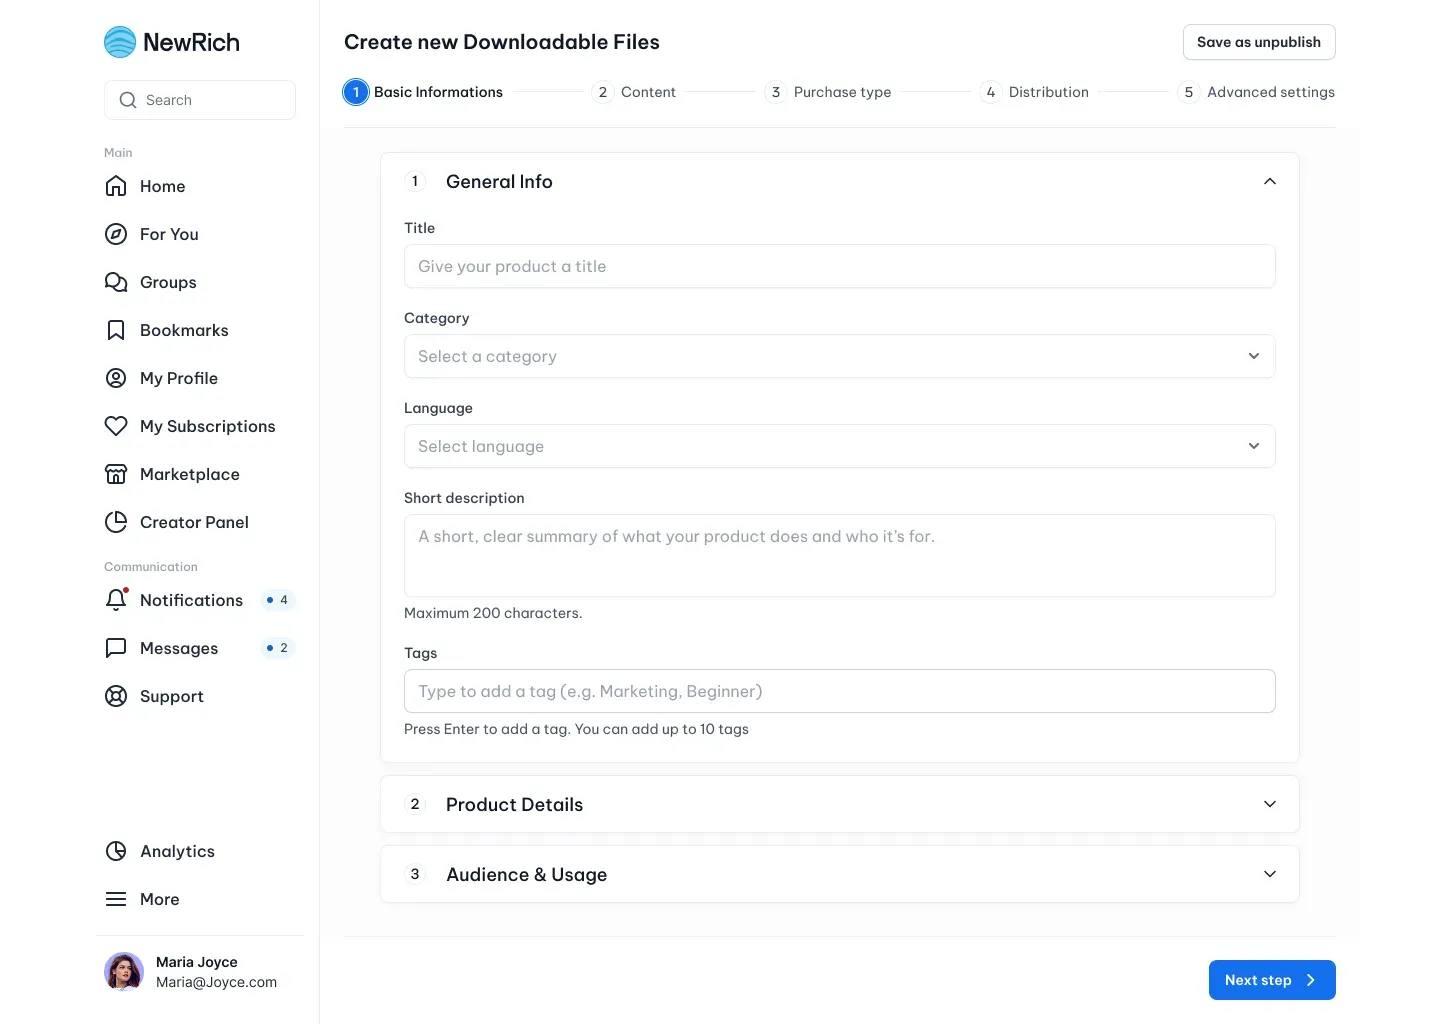
Step 1: Basic Information
Begin by defining the core information about your product. Add the title, category, language, description, and tags, then specify the type of downloadable product, what's included, who it's designed for, and how customers can use it.
This information helps customers understand exactly what they're purchasing before they complete the checkout.
Step 2: Content
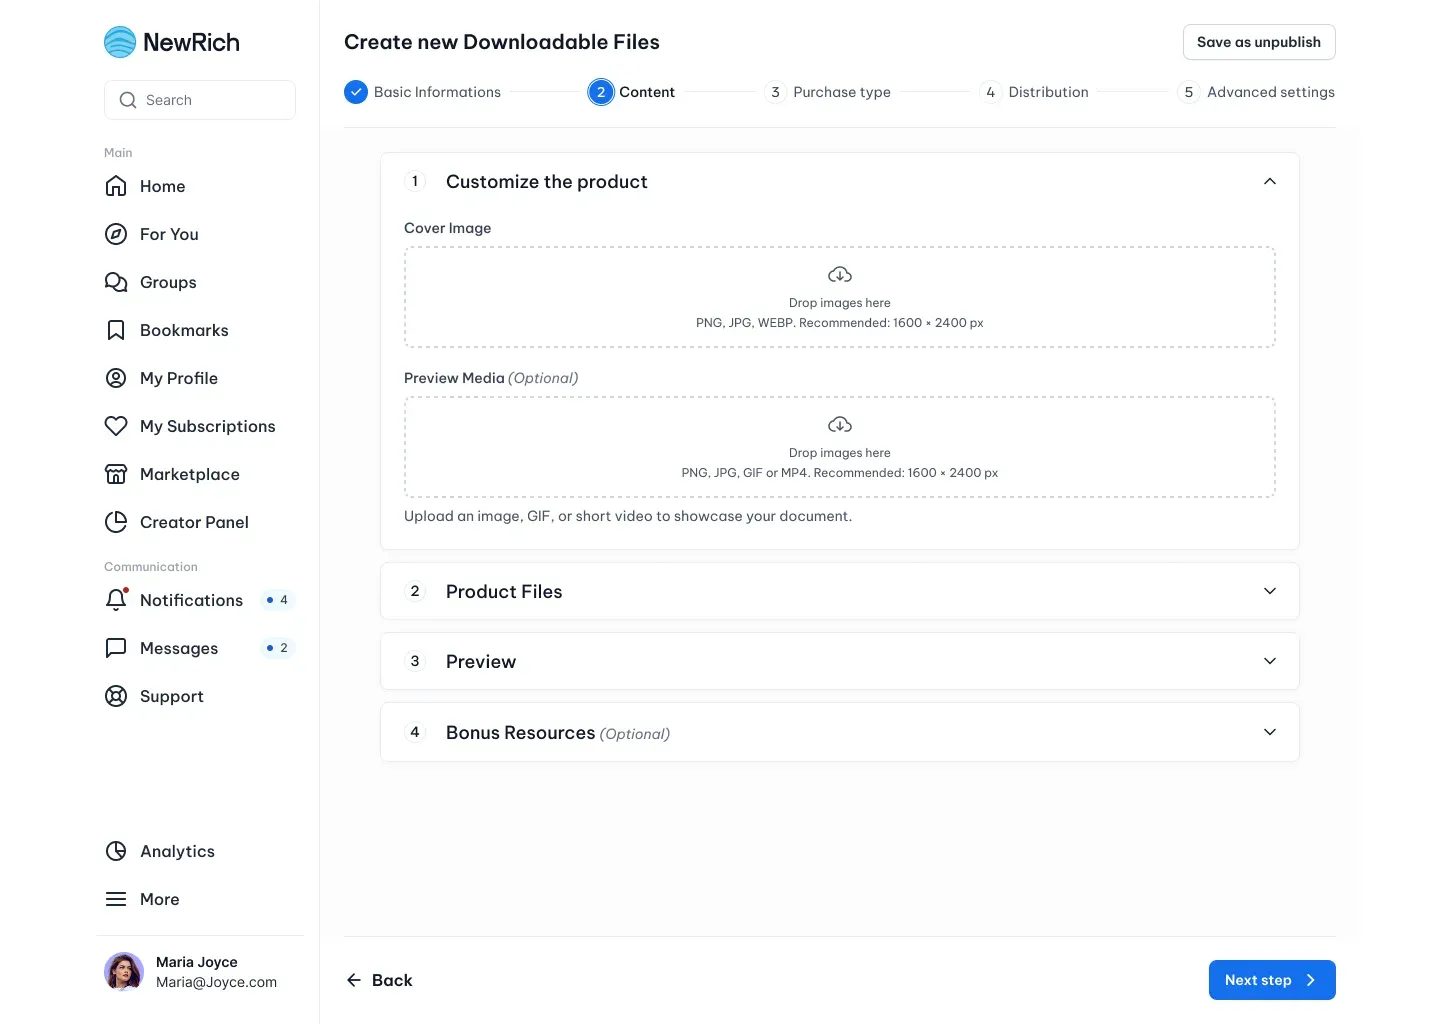
Next, upload and customize your downloadable product. Add a cover image, optional preview media, and upload the files customers will receive after purchase.
You can also provide a detailed product description, upload preview files or sample assets, and include optional bonus resources to increase the value of your offering.
This step prepares both the Marketplace presentation and the downloadable content delivered after purchase.
Step 3: Purchase Type
Choose how customers will access your product. You can offer it for free, sell it as a one-time purchase, or make it available through a recurring subscription with multiple billing options.
You can also configure promotional discounts for one-time purchases.
Step 4: Distribution
Choose where your product will appear after publishing. Every downloadable product is automatically listed in the Marketplace and on your creator profile.
Optionally, you can also promote it by sharing it in one of your existing Subfeeds, making it easier for your audience to discover.
Step 5: Advanced Settings
Before publishing, configure optional settings such as comments, purchase notifications, and scheduled publishing.
These settings give you additional control over how and when your product becomes available.
Publishing Your Product
Once everything is ready, review your setup, preview the Marketplace listing, and choose whether to save the product as a draft, schedule its release, or publish it immediately.
After publishing, your downloadable product becomes available through the Marketplace and any selected distribution channels.
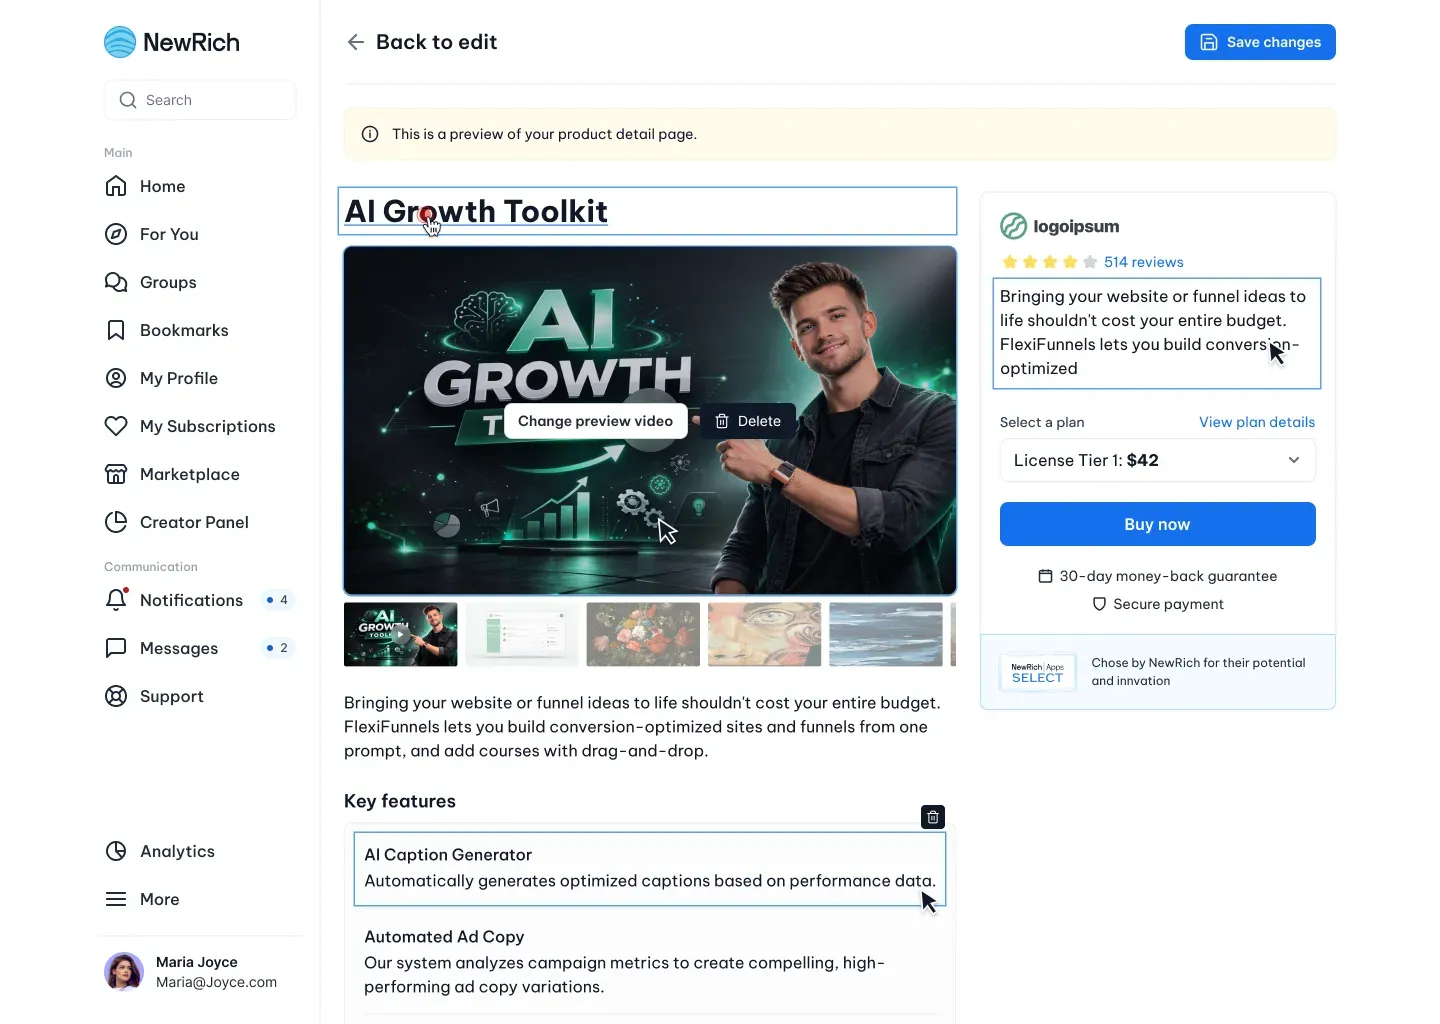
Live Editable Preview
Before submitting your product, you can use the Live Editable Preview to see exactly how your Marketplace listing will appear to customers.
The preview uses the same layout as the live product page and allows you to make quick edits without returning to the setup form.
You can:
- Edit text directly on the page
- Update descriptions and feature content
- Replace images and preview videos
- Reorder or remove optional content sections
- Instantly see how changes will appear to customers
This makes it easy to fine-tune your product page, improve presentation, and verify the customer experience before publishing.
Tip
Changes made in the Live Editable Preview are reflected in your product setup and can be saved before submitting the product for review.